> ## Documentation Index
> Fetch the complete documentation index at: https://wb-21fd5541-docs-hivemind-launch.mintlify.site/llms.txt
> Use this file to discover all available pages before exploring further.
# Add job to queue
> Add launch jobs to a W&B Launch queue using the App UI or CLI to schedule ML workloads on target resources.
This page describes how to add launch jobs to a launch queue. Adding a job to a queue submits it to run on the queue's target resource. You can schedule ML workloads against the compute environment your team configured.
Ensure that you, or someone on your team, already configured a launch queue. For more information, see [Set up Launch](/platform/launch/set-up-launch/).
## Add jobs to your queue
Add jobs to your queue interactively with the W\&B App or programmatically with the W\&B CLI.
To add a job to your queue interactively with the W\&B App:
1. Navigate to your W\&B project page.
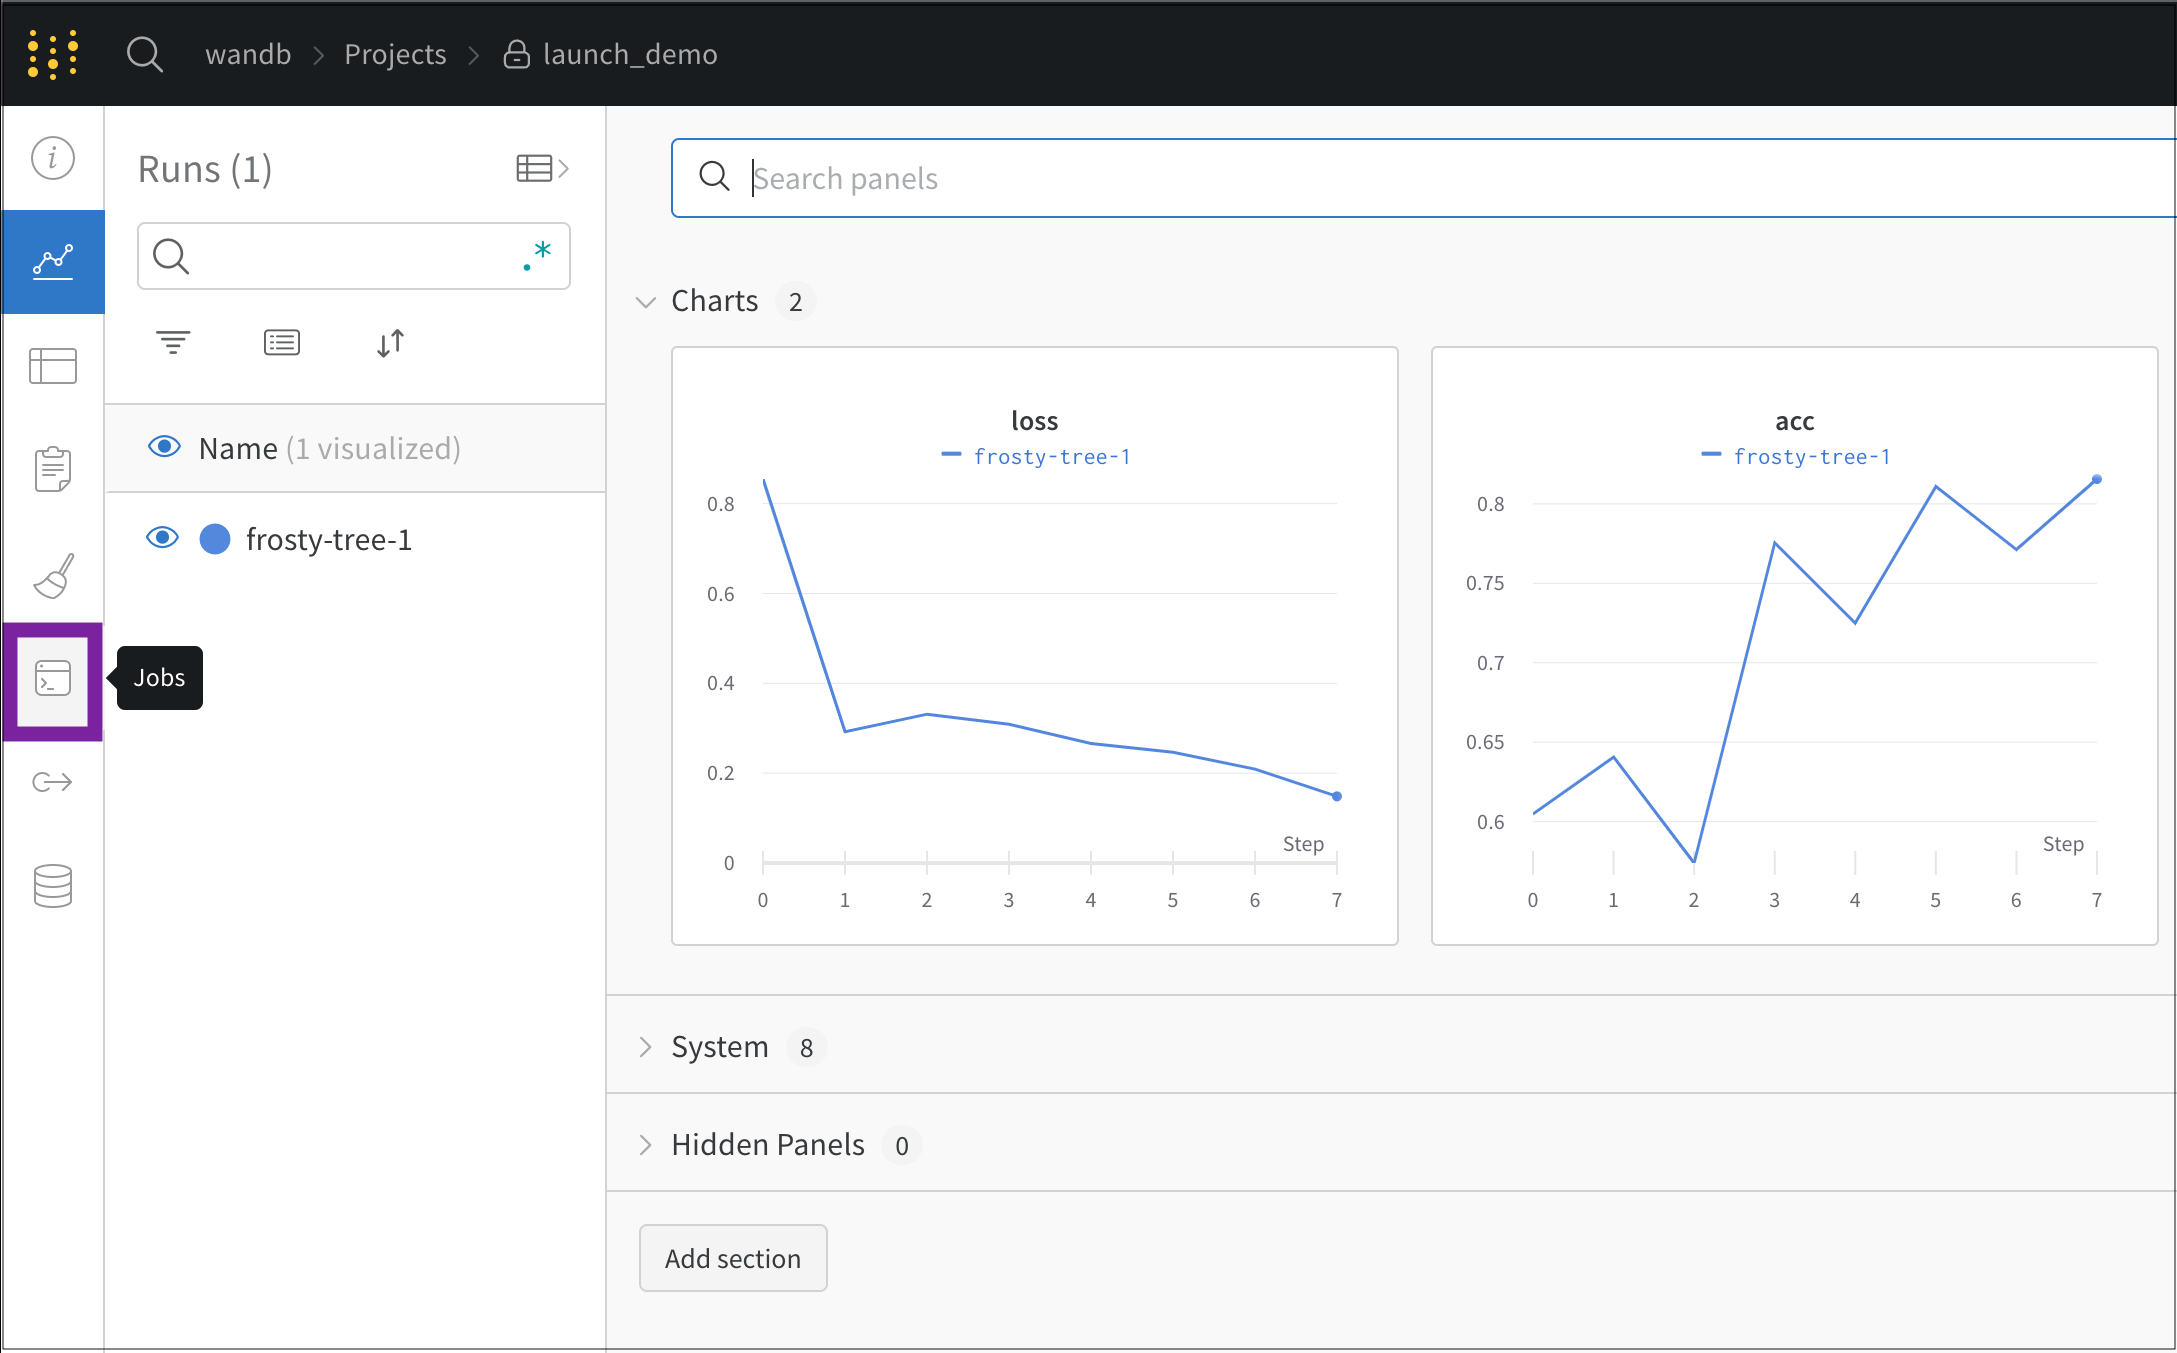
2. Select the **Jobs** icon in the project sidebar:
 3. The **Jobs** page displays a list of W\&B launch jobs created from previously executed W\&B runs.
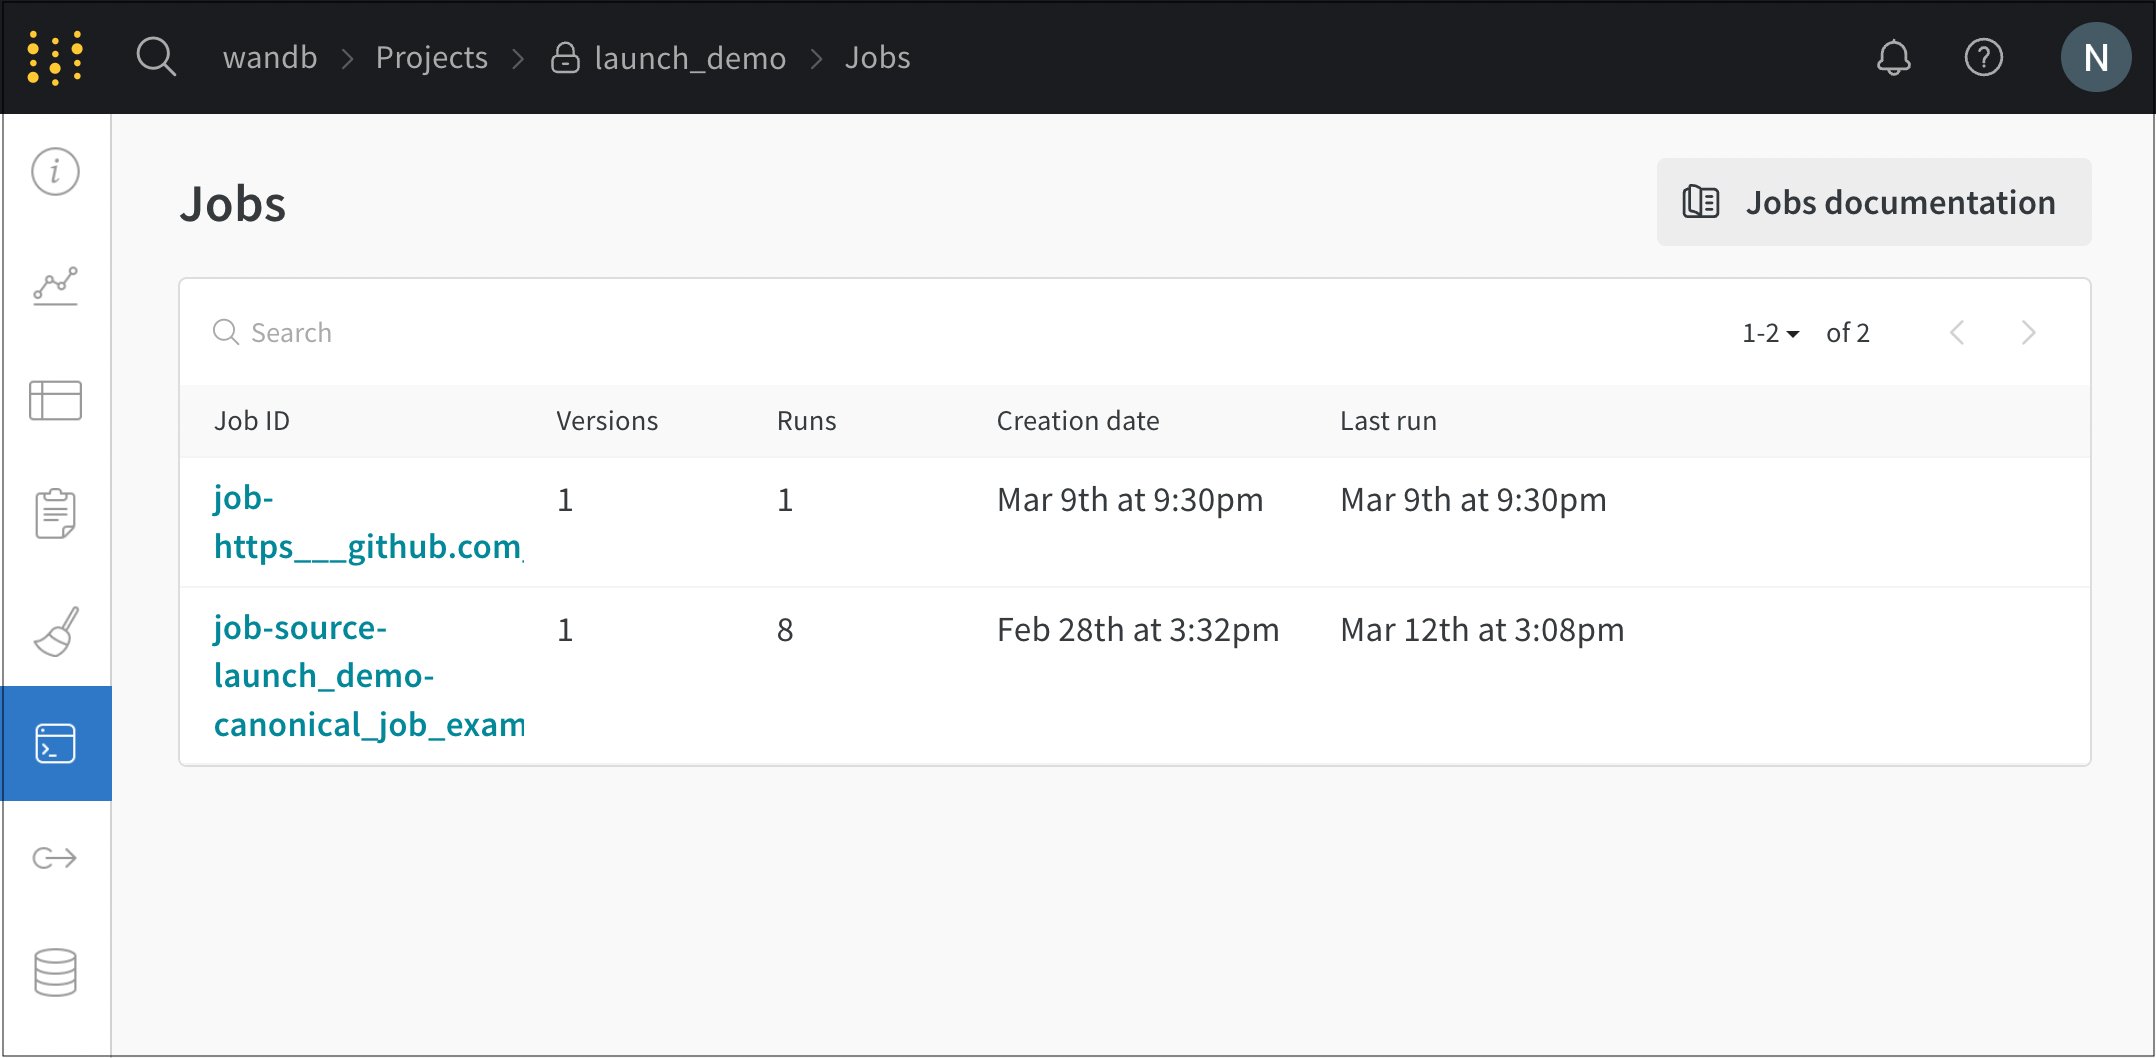 4. Select the **Launch** button next to the job name. A modal appears.
5. From the **Job version** dropdown, select the version of the launch job you want to use. Launch jobs are versioned like any other [W\&B artifact](/models/artifacts/create-a-new-artifact-version/). W\&B creates different versions of the same launch job if you modify the software dependencies or source code used to run the job.
6. Within the **Overrides** section, provide new values for any inputs configured for your launch job. Common overrides include a new entrypoint command, arguments, or values in the `wandb.Run.config` of your new W\&B run.
4. Select the **Launch** button next to the job name. A modal appears.
5. From the **Job version** dropdown, select the version of the launch job you want to use. Launch jobs are versioned like any other [W\&B artifact](/models/artifacts/create-a-new-artifact-version/). W\&B creates different versions of the same launch job if you modify the software dependencies or source code used to run the job.
6. Within the **Overrides** section, provide new values for any inputs configured for your launch job. Common overrides include a new entrypoint command, arguments, or values in the `wandb.Run.config` of your new W\&B run.
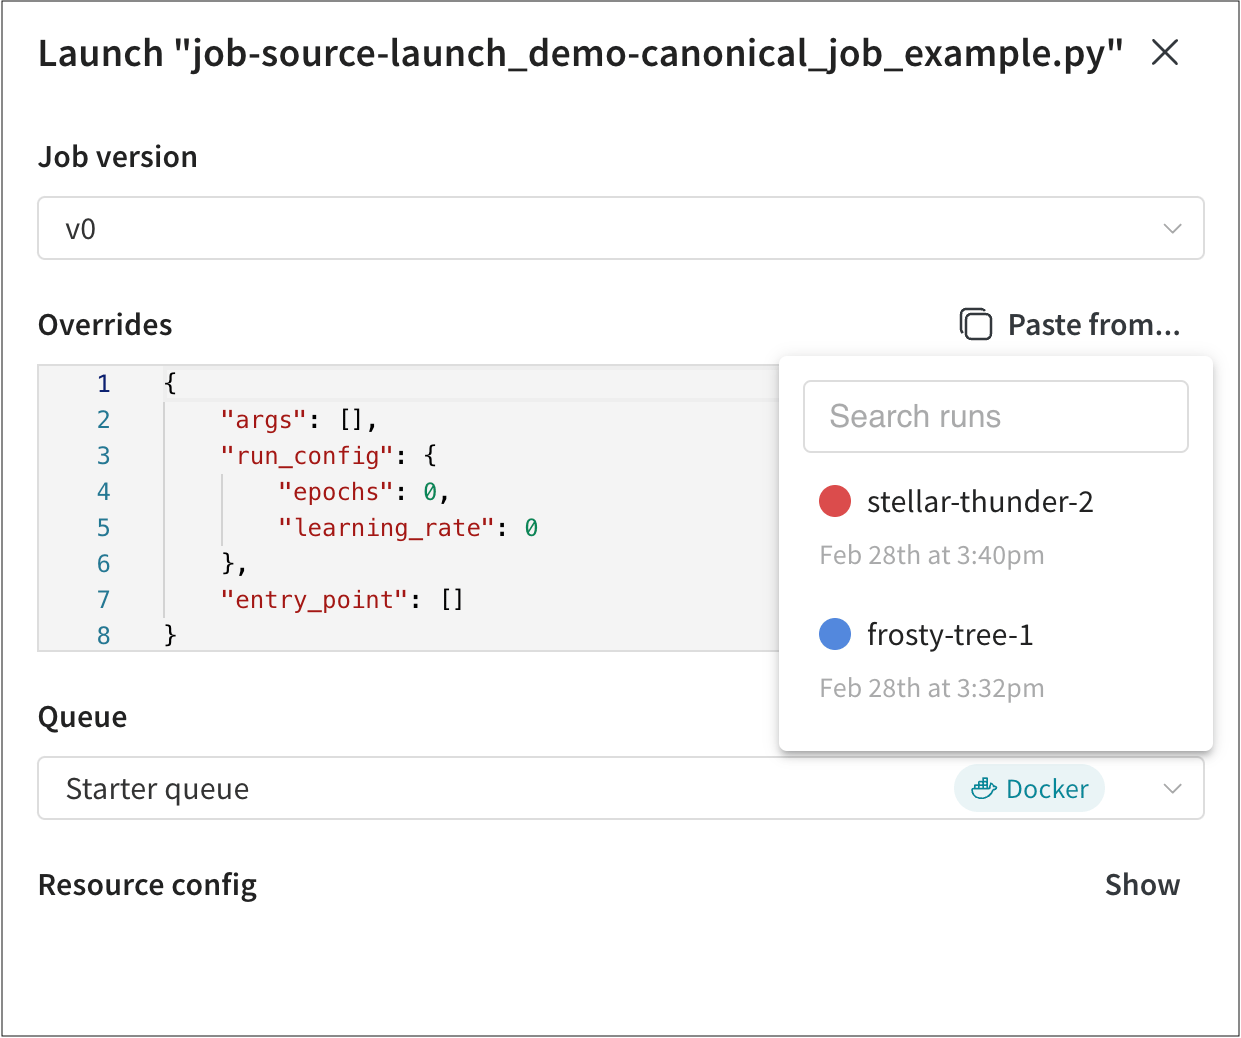 To copy and paste values from other W\&B runs that used your launch job, select the **Paste from...** button.
7\. From the **Queue** dropdown, select the name of the launch queue you want to add your launch job to.
8\. Use the **Job Priority** dropdown to specify the priority of your launch job. If the launch queue doesn't support prioritization, W\&B sets the priority to `Medium`.
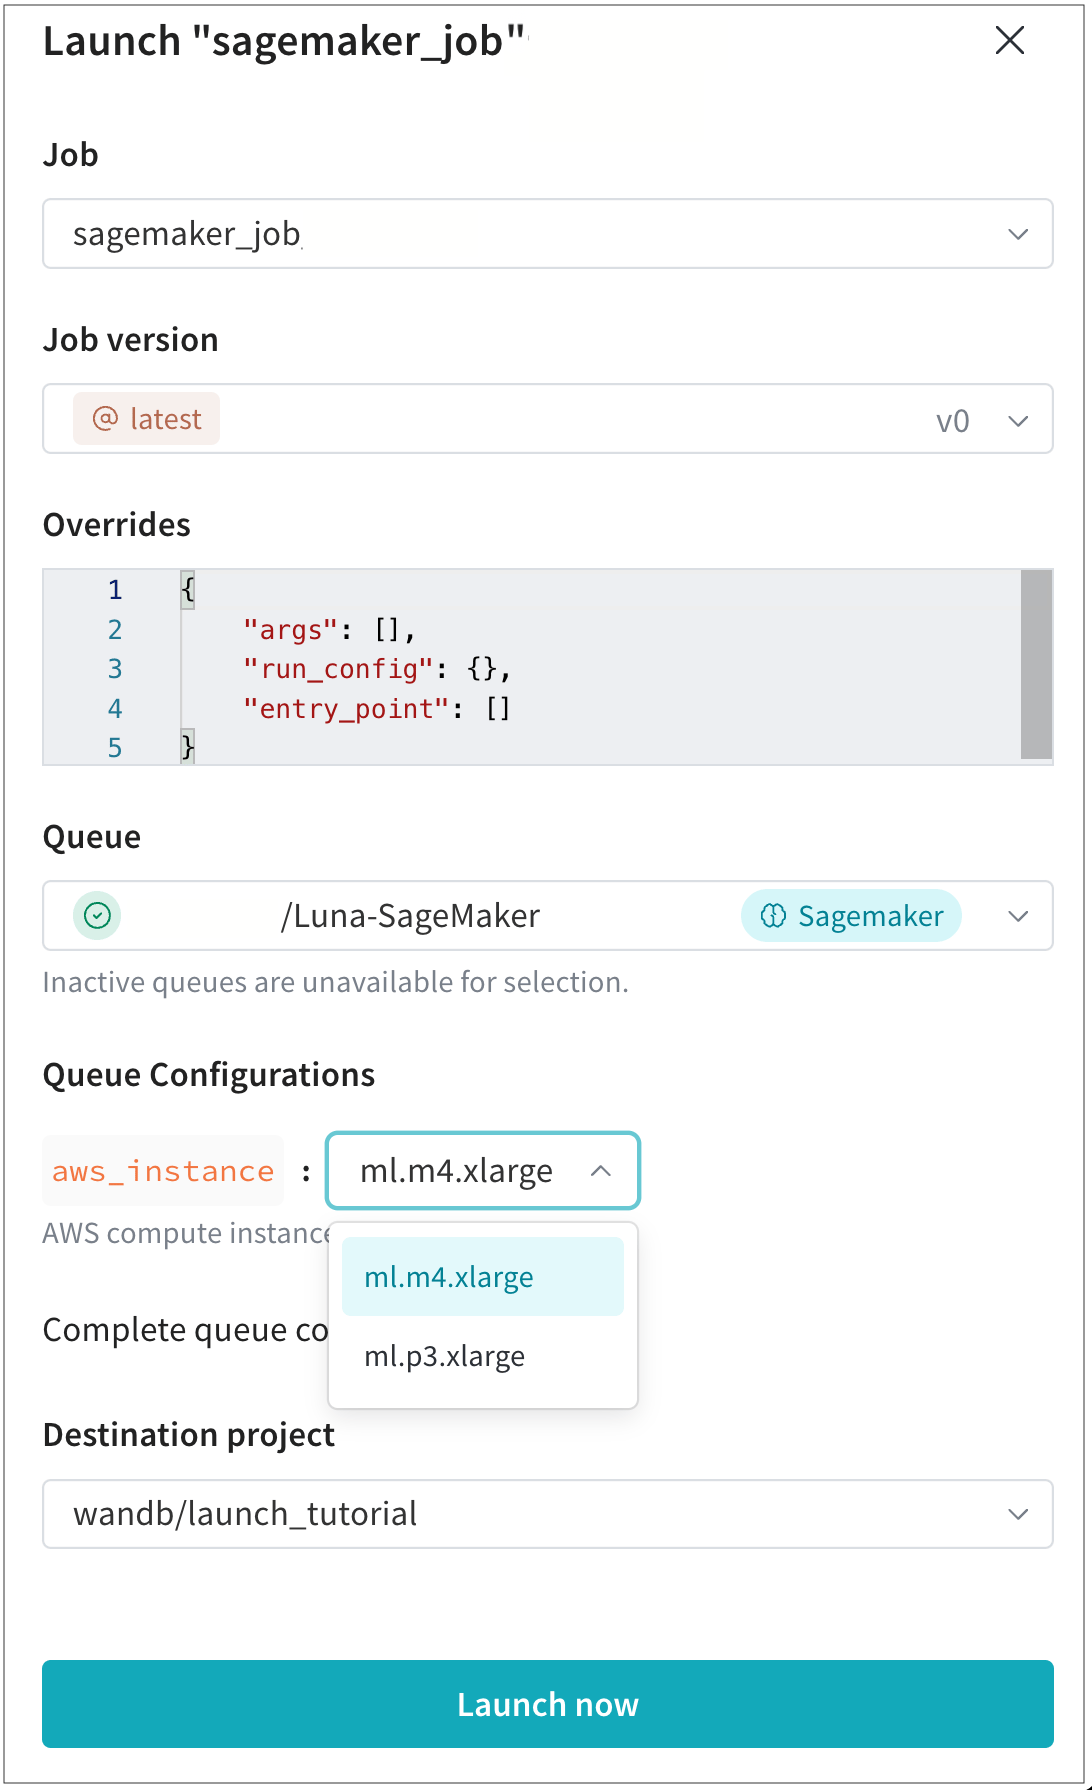
9\. Optional: Follow this step only if your team admin created a queue config template. Within the **Queue Configurations** field, provide values for configuration options that your team admin created. For example, the following image shows a team admin who configured AWS instance types that the team can use. In this case, team members can select either the `ml.m4.xlarge` or `ml.p3.xlarge` compute instance type to train their model.
To copy and paste values from other W\&B runs that used your launch job, select the **Paste from...** button.
7\. From the **Queue** dropdown, select the name of the launch queue you want to add your launch job to.
8\. Use the **Job Priority** dropdown to specify the priority of your launch job. If the launch queue doesn't support prioritization, W\&B sets the priority to `Medium`.
9\. Optional: Follow this step only if your team admin created a queue config template. Within the **Queue Configurations** field, provide values for configuration options that your team admin created. For example, the following image shows a team admin who configured AWS instance types that the team can use. In this case, team members can select either the `ml.m4.xlarge` or `ml.p3.xlarge` compute instance type to train their model.
 10. Select the **Destination project**, where the resulting run appears. This project must belong to the same entity as the queue.
11. Select the **Launch now** button.
Your job is now queued and runs on the queue's target resource. The resulting run appears in the destination project you selected.
Use the `wandb launch` command to add jobs to a queue. For example, using the script from the [Quickstart](/platform/launch/walkthrough/) guide, create a JSON file with the following hyperparameter overrides:
```json title="config.json" theme={null}
{
"overrides": {
"args": [],
"run_config": {
"learning_rate": 0,
"epochs": 0
},
"entry_point": []
}
}
```
W\&B Launch uses the default parameters if you don't provide a JSON configuration file.
To override the queue configuration, or if your launch queue doesn't have a configuration resource defined, specify the `resource_args` key in your `config.json` file. For example, continuing the preceding example, your `config.json` file might look similar to the following:
```json title="config.json" theme={null}
{
"overrides": {
"args": [],
"run_config": {
"learning_rate": 0,
"epochs": 0
},
"entry_point": []
},
"resource_args": {
"[RESOURCE-TYPE]" : {
"[KEY]": "[VALUE]"
}
}
}
```
Replace the bracketed placeholders with your own values.
Provide the name of the queue for the `queue` (`-q`) flag, the name of the job for the `job` (`-j`) flag, and the path to the configuration file for the `config` (`-c`) flag:
```bash theme={null}
wandb launch -j [JOB-NAME] -q [QUEUE-NAME] \
-e [ENTITY-NAME] -c path/to/config.json
```
If you work within a W\&B team, specify the `entity` flag (`-e`) to indicate which entity the queue uses.
After the command succeeds, your job is added to the specified queue and runs on the queue's target resource.
10. Select the **Destination project**, where the resulting run appears. This project must belong to the same entity as the queue.
11. Select the **Launch now** button.
Your job is now queued and runs on the queue's target resource. The resulting run appears in the destination project you selected.
Use the `wandb launch` command to add jobs to a queue. For example, using the script from the [Quickstart](/platform/launch/walkthrough/) guide, create a JSON file with the following hyperparameter overrides:
```json title="config.json" theme={null}
{
"overrides": {
"args": [],
"run_config": {
"learning_rate": 0,
"epochs": 0
},
"entry_point": []
}
}
```
W\&B Launch uses the default parameters if you don't provide a JSON configuration file.
To override the queue configuration, or if your launch queue doesn't have a configuration resource defined, specify the `resource_args` key in your `config.json` file. For example, continuing the preceding example, your `config.json` file might look similar to the following:
```json title="config.json" theme={null}
{
"overrides": {
"args": [],
"run_config": {
"learning_rate": 0,
"epochs": 0
},
"entry_point": []
},
"resource_args": {
"[RESOURCE-TYPE]" : {
"[KEY]": "[VALUE]"
}
}
}
```
Replace the bracketed placeholders with your own values.
Provide the name of the queue for the `queue` (`-q`) flag, the name of the job for the `job` (`-j`) flag, and the path to the configuration file for the `config` (`-c`) flag:
```bash theme={null}
wandb launch -j [JOB-NAME] -q [QUEUE-NAME] \
-e [ENTITY-NAME] -c path/to/config.json
```
If you work within a W\&B team, specify the `entity` flag (`-e`) to indicate which entity the queue uses.
After the command succeeds, your job is added to the specified queue and runs on the queue's target resource.