> ## Documentation Index
> Fetch the complete documentation index at: https://wb-21fd5541-docs-hivemind-launch.mintlify.site/llms.txt
> Use this file to discover all available pages before exploring further.
# NVIDIA NIM
> ChatNVIDIA 라이브러리를 통해 이루어지는 LLM call을 트레이스하고 로그하려면 Weave를 사용하세요
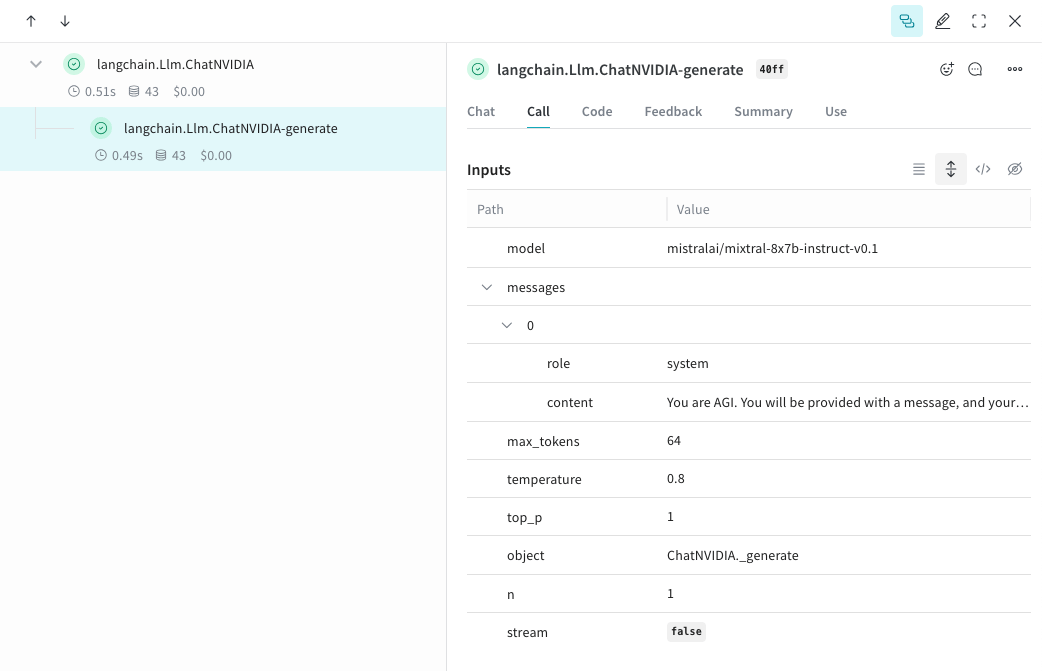
`weave.init()`를 호출하면 Weave가 [ChatNVIDIA](https://python.langchain.com/docs/integrations/chat/nvidia_ai_endpoints/) 라이브러리를 통해 이루어지는 LLM call을 자동으로 추적하고 로그합니다.
최신 튜토리얼은 [Weights & Biases on NVIDIA](https://wandb.ai/site/partners/nvidia)에서 확인하세요.
## 트레이싱
개발 중이든 프로덕션 환경이든, LLM 애플리케이션의 트레이스를 중앙 데이터베이스에 저장하는 것이 중요합니다. 이러한 트레이스는 디버깅에 활용할 수 있고, 애플리케이션을 개선하면서 평가에 사용할 까다로운 예시 데이터셋을 구축하는 데도 도움이 됩니다.
Weave는 [ChatNVIDIA Python 라이브러리](https://python.langchain.com/docs/integrations/chat/nvidia_ai_endpoints/)의 트레이스를 자동으로 캡처할 수 있습니다.
원하는 프로젝트 이름으로 `weave.init()`을 호출해 캡처를 시작하세요.
```python lines {4} theme={null}
from langchain_nvidia_ai_endpoints import ChatNVIDIA
import weave
client = ChatNVIDIA(model="mistralai/mixtral-8x7b-instruct-v0.1", temperature=0.8, max_tokens=64, top_p=1)
weave.init('emoji-bot')
messages=[
{
"role": "system",
"content": "You are AGI. You will be provided with a message, and your task is to respond using emojis only."
}]
response = client.invoke(messages)
```
```plaintext theme={null}
이 라이브러리는 Python에서만 제공되므로, 이 기능은 아직 TypeScript에서 사용할 수 없습니다.
```
## 직접 ops 추적하기
함수를 `@weave.op`으로 래핑하면 입력, 출력, 앱 로직 캡처가 시작되어 데이터가 앱 전반에서 어떻게 흐르는지 디버그할 수 있습니다. ops를 깊이 중첩하고 추적하려는 함수의 트리를 구성할 수 있습니다. 또한 실험하는 동안 코드 버전 관리도 자동으로 시작되어 git에 커밋되지 않은 임시 세부 정보까지 캡처할 수 있습니다.
[ChatNVIDIA Python 라이브러리](https://python.langchain.com/docs/integrations/chat/nvidia_ai_endpoints/)를 호출하는 [`@weave.op`](/ko/weave/guides/tracking/ops) 데코레이터가 적용된 함수만 만들면 됩니다.
아래 예시에는 op로 래핑된 함수가 2개 있습니다. 이렇게 하면 RAG 앱의 retrieval step 같은 중간 step이 앱 동작에 어떤 영향을 미치는지 확인하는 데 도움이 됩니다.
```python lines {1,9,11,29,31,33} theme={null}
import weave
from langchain_nvidia_ai_endpoints import ChatNVIDIA
import requests, random
PROMPT="""Emulate the Pokedex from early Pokémon episodes. State the name of the Pokemon and then describe it.
Your tone is informative yet sassy, blending factual details with a touch of dry humor. Be concise, no more than 3 sentences. """
POKEMON = ['pikachu', 'charmander', 'squirtle', 'bulbasaur', 'jigglypuff', 'meowth', 'eevee']
client = ChatNVIDIA(model="mistralai/mixtral-8x7b-instruct-v0.1", temperature=0.7, max_tokens=100, top_p=1)
@weave.op
def get_pokemon_data(pokemon_name):
# 이는 RAG 앱의 retrieval step처럼 애플리케이션 내의 한 step입니다
url = f"https://pokeapi.co/api/v2/pokemon/{pokemon_name}"
response = requests.get(url)
if response.status_code == 200:
data = response.json()
name = data["name"]
types = [t["type"]["name"] for t in data["types"]]
species_url = data["species"]["url"]
species_response = requests.get(species_url)
evolved_from = "Unknown"
if species_response.status_code == 200:
species_data = species_response.json()
if species_data["evolves_from_species"]:
evolved_from = species_data["evolves_from_species"]["name"]
return {"name": name, "types": types, "evolved_from": evolved_from}
else:
return None
@weave.op
def pokedex(name: str, prompt: str) -> str:
# 이는 다른 op를 호출하는 루트 op입니다
data = get_pokemon_data(name)
if not data: return "Error: Unable to fetch data"
messages=[
{"role": "system","content": prompt},
{"role": "user", "content": str(data)}
]
response = client.invoke(messages)
return response.content
weave.init('pokedex-nvidia')
# 특정 Pokémon의 데이터를 조회합니다
pokemon_data = pokedex(random.choice(POKEMON), PROMPT)
```
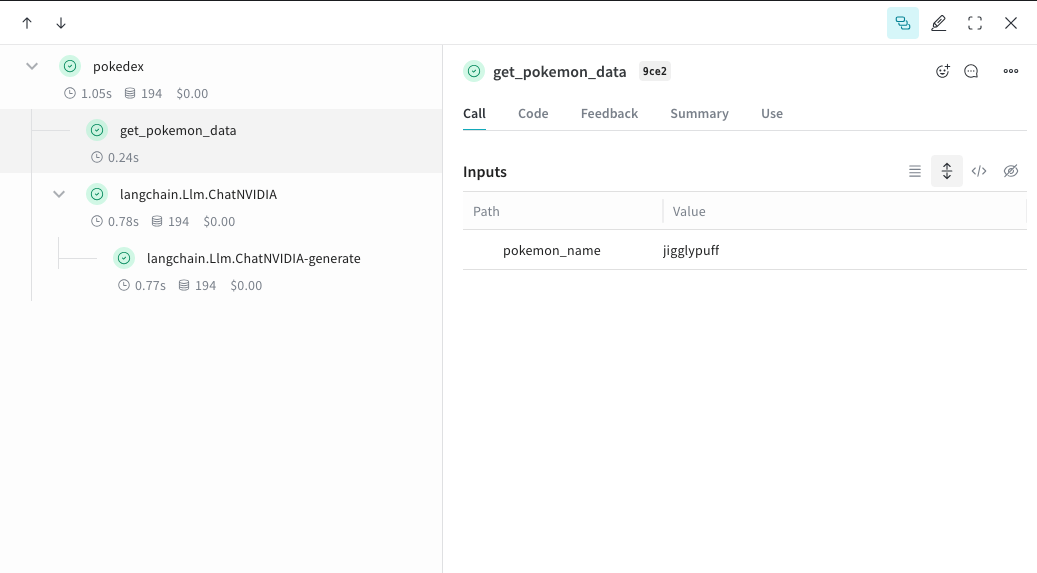
Weave로 이동한 다음 UI에서 `get_pokemon_data`를 클릭하면 해당 step의 입력과 출력을 확인할 수 있습니다.
```plaintext theme={null}
이 기능은 이 라이브러리가 Python에만 있으므로 아직 TypeScript에서는 사용할 수 없습니다.
```
## 더 쉽게 실험할 수 있도록 `Model` 만들기
구성 요소가 많아지면 실험을 체계적으로 정리하기가 어렵습니다. [`Model`](/ko/weave/guides/core-types/models) 클래스를 사용하면 시스템 프롬프트나 사용 중인 모델처럼 앱의 실험 관련 세부 사항을 포착하고 정리할 수 있습니다. 이렇게 하면 앱의 다양한 반복 버전을 정리하고 비교하는 데 도움이 됩니다.
[`Model`](/ko/weave/guides/core-types/models)은 코드 버전 관리와 입력/출력 포착에 더해, 애플리케이션의 동작을 제어하는 구조화된 매개변수도 포착하므로 어떤 매개변수가 가장 잘 작동했는지 쉽게 찾을 수 있습니다. 또한 Weave Models를 `serve` 및 [`Evaluation`](/ko/weave/guides/core-types/evaluations)s와 함께 사용할 수도 있습니다.
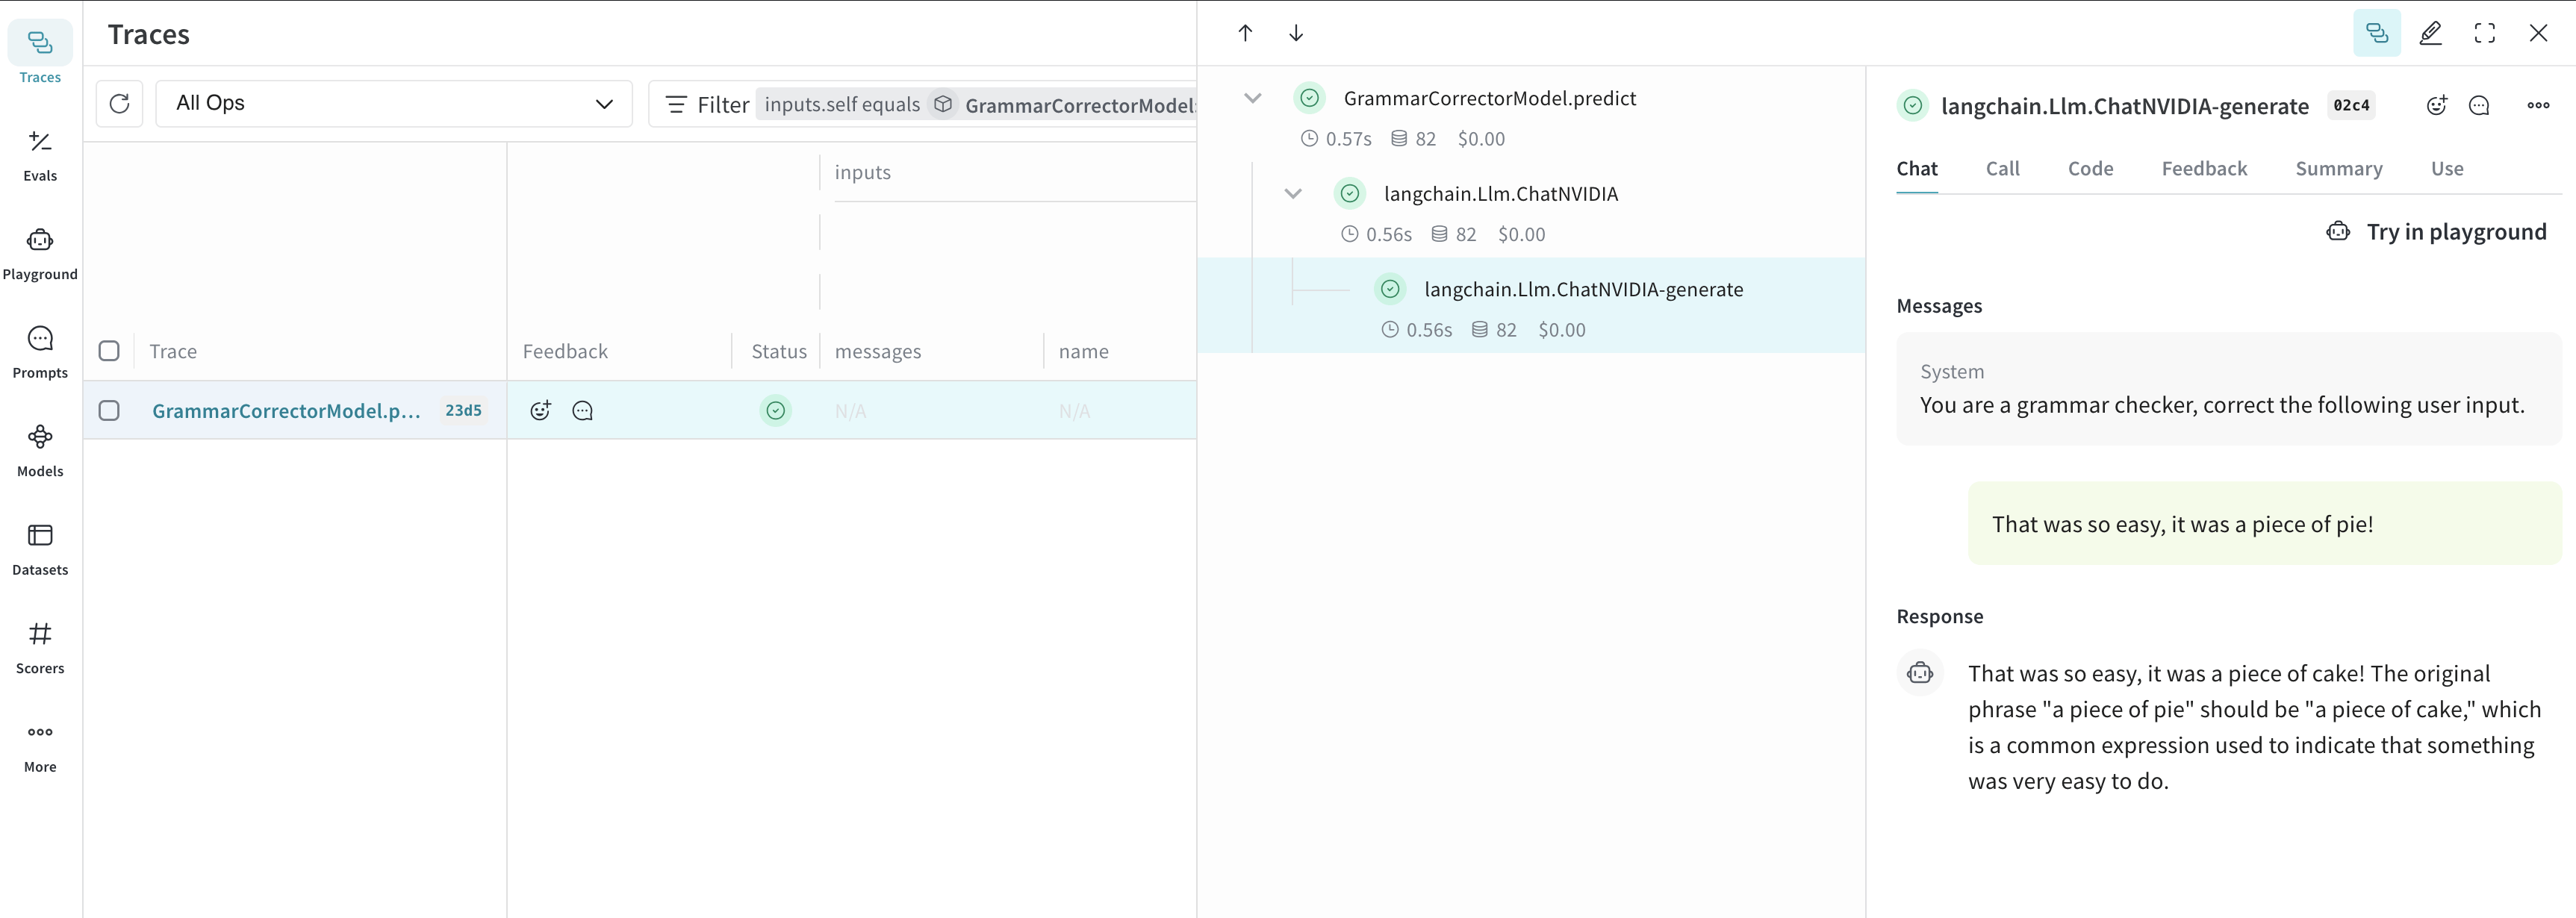
아래 예시에서는 `model`과 `system_message`를 바꿔 가며 실험할 수 있습니다. 이 둘 중 하나를 변경할 때마다 `GrammarCorrectorModel`의 새 *version* 이 생성됩니다.
```python lines theme={null}
import weave
from langchain_nvidia_ai_endpoints import ChatNVIDIA
weave.init('grammar-nvidia')
class GrammarCorrectorModel(weave.Model): # `weave.Model`로 변경
system_message: str
@weave.op()
def predict(self, user_input): # `predict`로 변경
client = ChatNVIDIA(model="mistralai/mixtral-8x7b-instruct-v0.1", temperature=0, max_tokens=100, top_p=1)
messages=[
{
"role": "system",
"content": self.system_message
},
{
"role": "user",
"content": user_input
}
]
response = client.invoke(messages)
return response.content
corrector = GrammarCorrectorModel(
system_message = "You are a grammar checker, correct the following user input.")
result = corrector.predict("That was so easy, it was a piece of pie!")
print(result)
```
```plaintext theme={null}
이 라이브러리는 Python에서만 제공되므로 이 기능은 아직 TypeScript에서 사용할 수 없습니다.
```
## 사용 정보
ChatNVIDIA 인테그레이션은 `invoke`, `stream` 및 해당 비동기 버전을 지원합니다. 또한 도구 사용도 지원합니다.
ChatNVIDIA는 여러 유형의 모델과 함께 사용하도록 설계되었기 때문에 함수 호출은 지원하지 않습니다.