> ## Documentation Index
> Fetch the complete documentation index at: https://wb-21fd5541-docs-hivemind-launch.mintlify.site/llms.txt
> Use this file to discover all available pages before exploring further.

# Slack 알림 설정

> W&B Server 경고, 알림 및 모니터링 업데이트를 수신하도록 Slack 애플리케이션을 생성하고 설정합니다.

W\&B Server를 [Slack](https://slack.com/)과 통합하여 W\&B 인스턴스가 팀에서 이미 사용 중인 Slack 워크스페이스로 경고와 알림을 보낼 수 있도록 하세요. 이 페이지에서는 W\&B Server 관리자가 Slack 애플리케이션을 만들고 OAuth 범위와 리디렉션 URL을 설정한 뒤, 해당 애플리케이션을 W\&B에 등록하는 방법을 안내합니다.

<Note>
  [W\&B Dedicated Cloud 배포에서 Slack 알림을 설정하는 방법을 보여주는 비디오](https://www.youtube.com/watch?v=JmvKb-7u-oU)를 시청하세요(6분).
</Note>

<div id="create-the-slack-application">
  ## Slack 애플리케이션 만들기
</div>

W\&B Server는 알림을 전달하는 브리지로 맞춤형 Slack 애플리케이션을 사용합니다. 알림을 받을 Slack 워크스페이스에서 해당 애플리케이션을 만들려면 아래 절차를 따르세요.

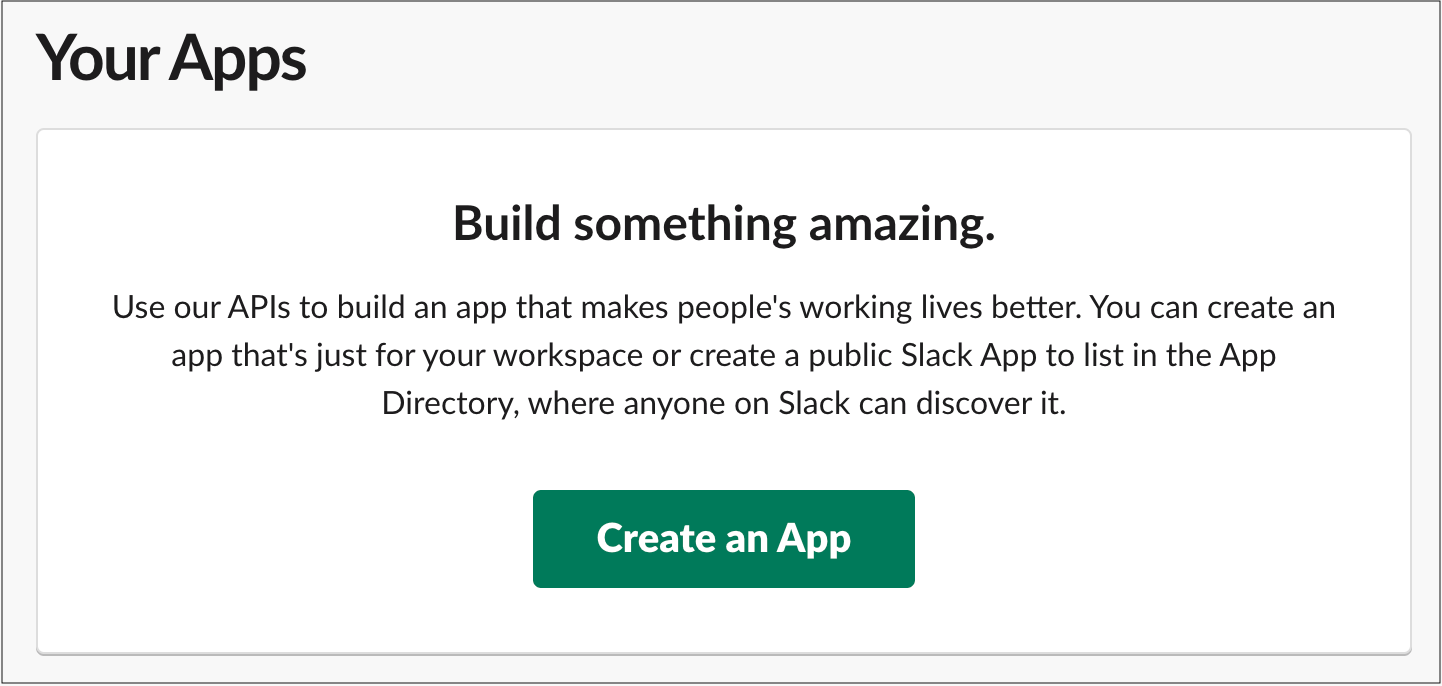
1. [https://api.slack.com/apps](https://api.slack.com/apps)에 접속한 다음 **Create an App**를 선택합니다.

   <Frame>
     <img src="https://mintcdn.com/wb-21fd5541-docs-hivemind-launch/GExaOHOKeIAPE2Yp/images/hosting/create_an_app.png?fit=max&auto=format&n=GExaOHOKeIAPE2Yp&q=85&s=794a94fec8216337c02e7f3cb8270dca" alt="Create an App 버튼" width="1442" height="686" data-path="images/hosting/create_an_app.png" />
   </Frame>

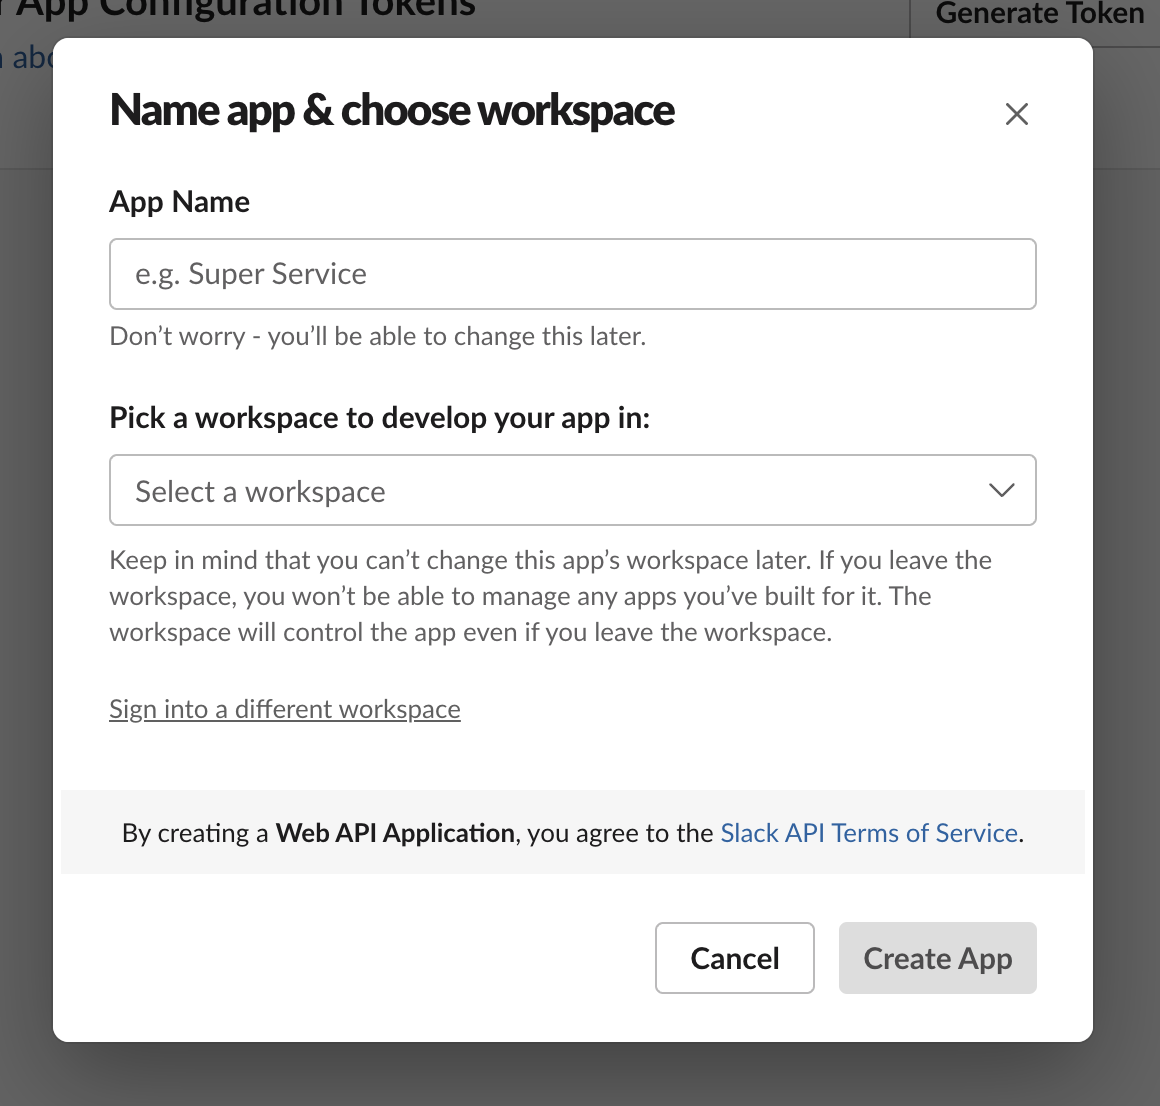
2. **App Name** 필드에 앱 이름을 입력합니다.

3. 앱을 개발할 Slack 워크스페이스를 선택합니다. 여기서 사용하는 Slack 워크스페이스는 알림에 사용할 워크스페이스와 동일해야 합니다.
   <Frame>
     <img src="https://mintcdn.com/wb-21fd5541-docs-hivemind-launch/GExaOHOKeIAPE2Yp/images/hosting/name_app_workspace.png?fit=max&auto=format&n=GExaOHOKeIAPE2Yp&q=85&s=9f152778eaf1838d80916af153b8eec4" alt="앱 이름 및 Workspace 선택" width="1160" height="1106" data-path="images/hosting/name_app_workspace.png" />
   </Frame>

<div id="configure-the-slack-application">
  ## Slack 애플리케이션 설정
</div>

Slack 애플리케이션을 만든 후에는 메시지를 게시하고 OAuth 핸드셰이크 중 W\&B의 리디렉션을 수락할 수 있도록 필요한 권한을 부여하세요.

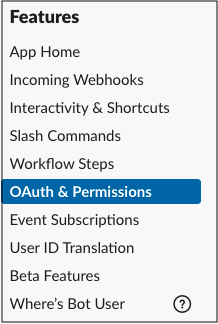
1. 왼쪽 사이드바에서 **OAuth & Permissions**를 선택하세요.

   <Frame>
     <img src="https://mintcdn.com/wb-21fd5541-docs-hivemind-launch/GExaOHOKeIAPE2Yp/images/hosting/add_an_oath.png?fit=max&auto=format&n=GExaOHOKeIAPE2Yp&q=85&s=e2f3121c6fc3ed156cc67f7f81735ef4" alt="OAuth & Permissions 메뉴" width="218" height="324" data-path="images/hosting/add_an_oath.png" />
   </Frame>

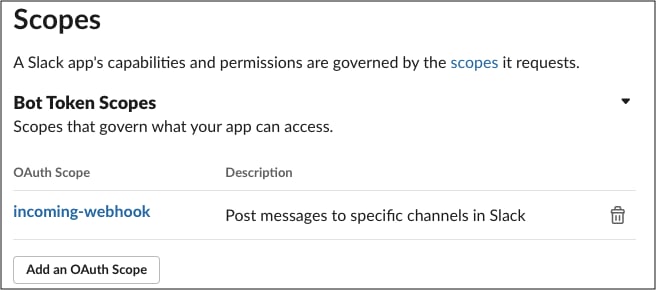
2. **Scopes** 섹션에서 봇에 `incoming_webhook` 범위를 부여하세요. 범위는 앱이 개발 Workspace에서 작업을 수행할 수 있는 권한을 제공합니다.

   봇용 OAuth 범위에 대한 자세한 내용은 Slack API 문서의 [Understanding OAuth scopes for bots](https://api.slack.com/legacy/oauth-scopes) 를 참조하세요.
   <Frame>
     <img src="https://mintcdn.com/wb-21fd5541-docs-hivemind-launch/GExaOHOKeIAPE2Yp/images/hosting/save_urls.png?fit=max&auto=format&n=GExaOHOKeIAPE2Yp&q=85&s=9b0dc046f9f36588d9a2e1107a3d9462" alt="봇 토큰 범위" width="656" height="291" data-path="images/hosting/save_urls.png" />
   </Frame>

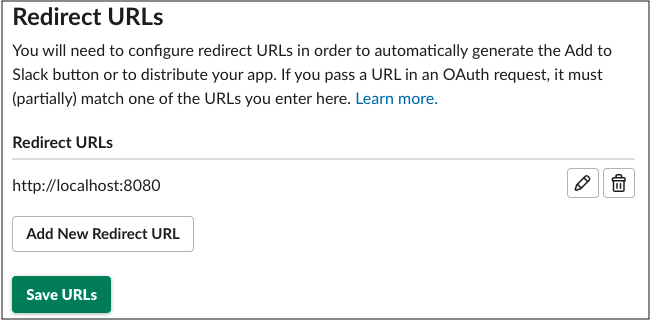
3. **Redirect URL**이 W\&B 설치를 가리키도록 설정하세요. 로컬 시스템 설정에서 호스트 URL로 지정한 것과 동일한 URL을 사용하세요. 인스턴스에 서로 다른 DNS 매핑이 있는 경우 여러 URL을 지정할 수 있습니다.
   <Frame>
     <img src="https://mintcdn.com/wb-21fd5541-docs-hivemind-launch/GExaOHOKeIAPE2Yp/images/hosting/redirect_urls.png?fit=max&auto=format&n=GExaOHOKeIAPE2Yp&q=85&s=3b81da979d4b1019eb70ed476663918a" alt="Redirect URLs 설정" width="650" height="321" data-path="images/hosting/redirect_urls.png" />
   </Frame>

4. **Save URLs**를 선택하세요.

5. 선택 사항: **Restrict API Token Usage** 아래에서 W\&B 인스턴스에 대해 허용 목록에 추가할 IP 또는 IP 범위를 지정하세요. 허용된 IP 주소를 제한하면 Slack 애플리케이션의 보안을 강화하는 데 도움이 됩니다.
<div id="register-your-slack-application-with-wb">
  ## Slack 애플리케이션을 W\&B에 등록하세요
</div>

W\&B가 이를 사용해 알림을 전송할 수 있도록, 구성한 Slack 애플리케이션을 W\&B 인스턴스에 등록하세요.

1. 배포 방식에 따라 W\&B 인스턴스의 **System Settings** 또는 **System Console** 페이지로 이동하세요.

2. 현재 보고 있는 System 페이지에 따라 다음 옵션 중 하나를 따르세요.

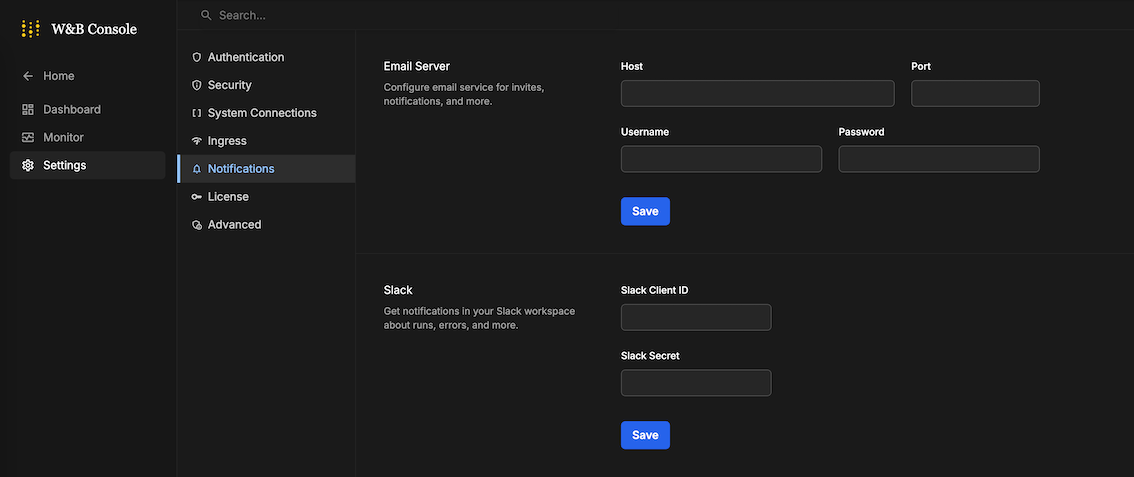
   * **System Console**에 있는 경우: **Settings**로 이동한 다음 **Notifications**로 이동하세요.

     <Frame>
       <img src="https://mintcdn.com/wb-21fd5541-docs-hivemind-launch/GExaOHOKeIAPE2Yp/images/hosting/register_slack_app_console.png?fit=max&auto=format&n=GExaOHOKeIAPE2Yp&q=85&s=defac6a6ae855b731f77011c9fa923c0" alt="System Console 알림" width="1134" height="477" data-path="images/hosting/register_slack_app_console.png" />
     </Frame>

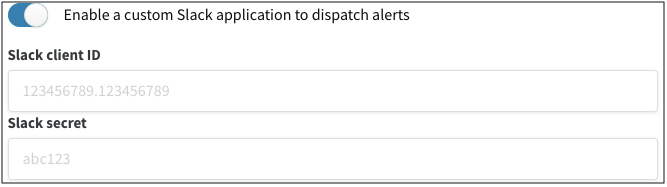
   * **System Settings**에 있는 경우: 맞춤형 Slack 애플리케이션을 사용 설정하려면 **Enable a custom Slack application to dispatch alerts** 표시/숨기기를 켜세요.
     <Frame>
       <img src="https://mintcdn.com/wb-21fd5541-docs-hivemind-launch/GExaOHOKeIAPE2Yp/images/hosting/register_slack_app.png?fit=max&auto=format&n=GExaOHOKeIAPE2Yp&q=85&s=e5f7854331e7a1b06e8557d17058594c" alt="Slack 애플리케이션 활성화 표시/숨기기" width="667" height="187" data-path="images/hosting/register_slack_app.png" />
     </Frame>

3. **Slack client ID**와 **Slack secret**을 입력한 다음 **Save**를 선택하세요. application의 client ID와 secret은 **Settings**의 **Basic Information**에서 확인할 수 있습니다.

4. 모든 것이 제대로 작동하는지 확인하려면 W\&B App에서 Slack 인테그레이션을 설정하세요.

이제 W\&B Server가 Slack 애플리케이션에 등록되었으며, 구성된 Slack 워크스페이스로 알림을 전송할 수 있습니다.