> ## Documentation Index
> Fetch the complete documentation index at: https://wb-21fd5541-docs-hivemind-launch.mintlify.site/llms.txt
> Use this file to discover all available pages before exploring further.
# トレース表示を確認してカスタマイズする
> UIで call を表示し、トレースデータの表示方法をカスタマイズする
W\&B Weave で Calls を作成したら、1 つの call を開いて、その入力、出力、メタデータを確認したいことがよくあります。このページでは、UI または SDK で call を表示する方法と、`weave.Markdown` を使用して UI でのトレースデータの表示方法をカスタマイズする方法を説明します。
UIで Call を表示するには:
1. [wandb.ai](https://wandb.ai/) にアクセスし、プロジェクトを選択します。
2. Weave プロジェクトのサイドバーで、**Traces** をクリックします。
3. 表で表示したい Call を検索します。
4. Call をクリックして詳細ページを開きます。
Trace view の詳細については、[Weave Trace view を操作する](/ja/weave/guides/tracking/trace-tree) を参照してください。
W\&B Weave Python SDK を使用して call を表示するには、[`get_call`](/ja/weave/reference/python-sdk/trace/weave_client#method-get_call) method を使用します。
```python lines theme={null}
import weave
# クライアントを初期化する
client = weave.init("your-project-name")
# ID で特定の call を取得する
call = client.get_call("call-uuid-here")
print(call)
```
```typescript lines theme={null}
import * as weave from 'weave'
// クライアントを初期化する
const client = await weave.init('intro-example')
// ID で特定の call を取得する
const call = await client.getCall('call-uuid-here')
console.log(call)
```
Service API を使用して call を表示するには、[`/call/read`](https://docs.wandb.ai/weave/reference/service-api/calls/call-read) エンドポイントにリクエストを送信します。
```bash theme={null}
curl -L 'https://trace.wandb.ai/call/read' \
-H 'Content-Type: application/json' \
-H 'Accept: application/json' \
-d '{
"project_id": "string",
"id": "string",
}'
```
## `weave.Markdown` でレンダリングされるトレースをカスタマイズする
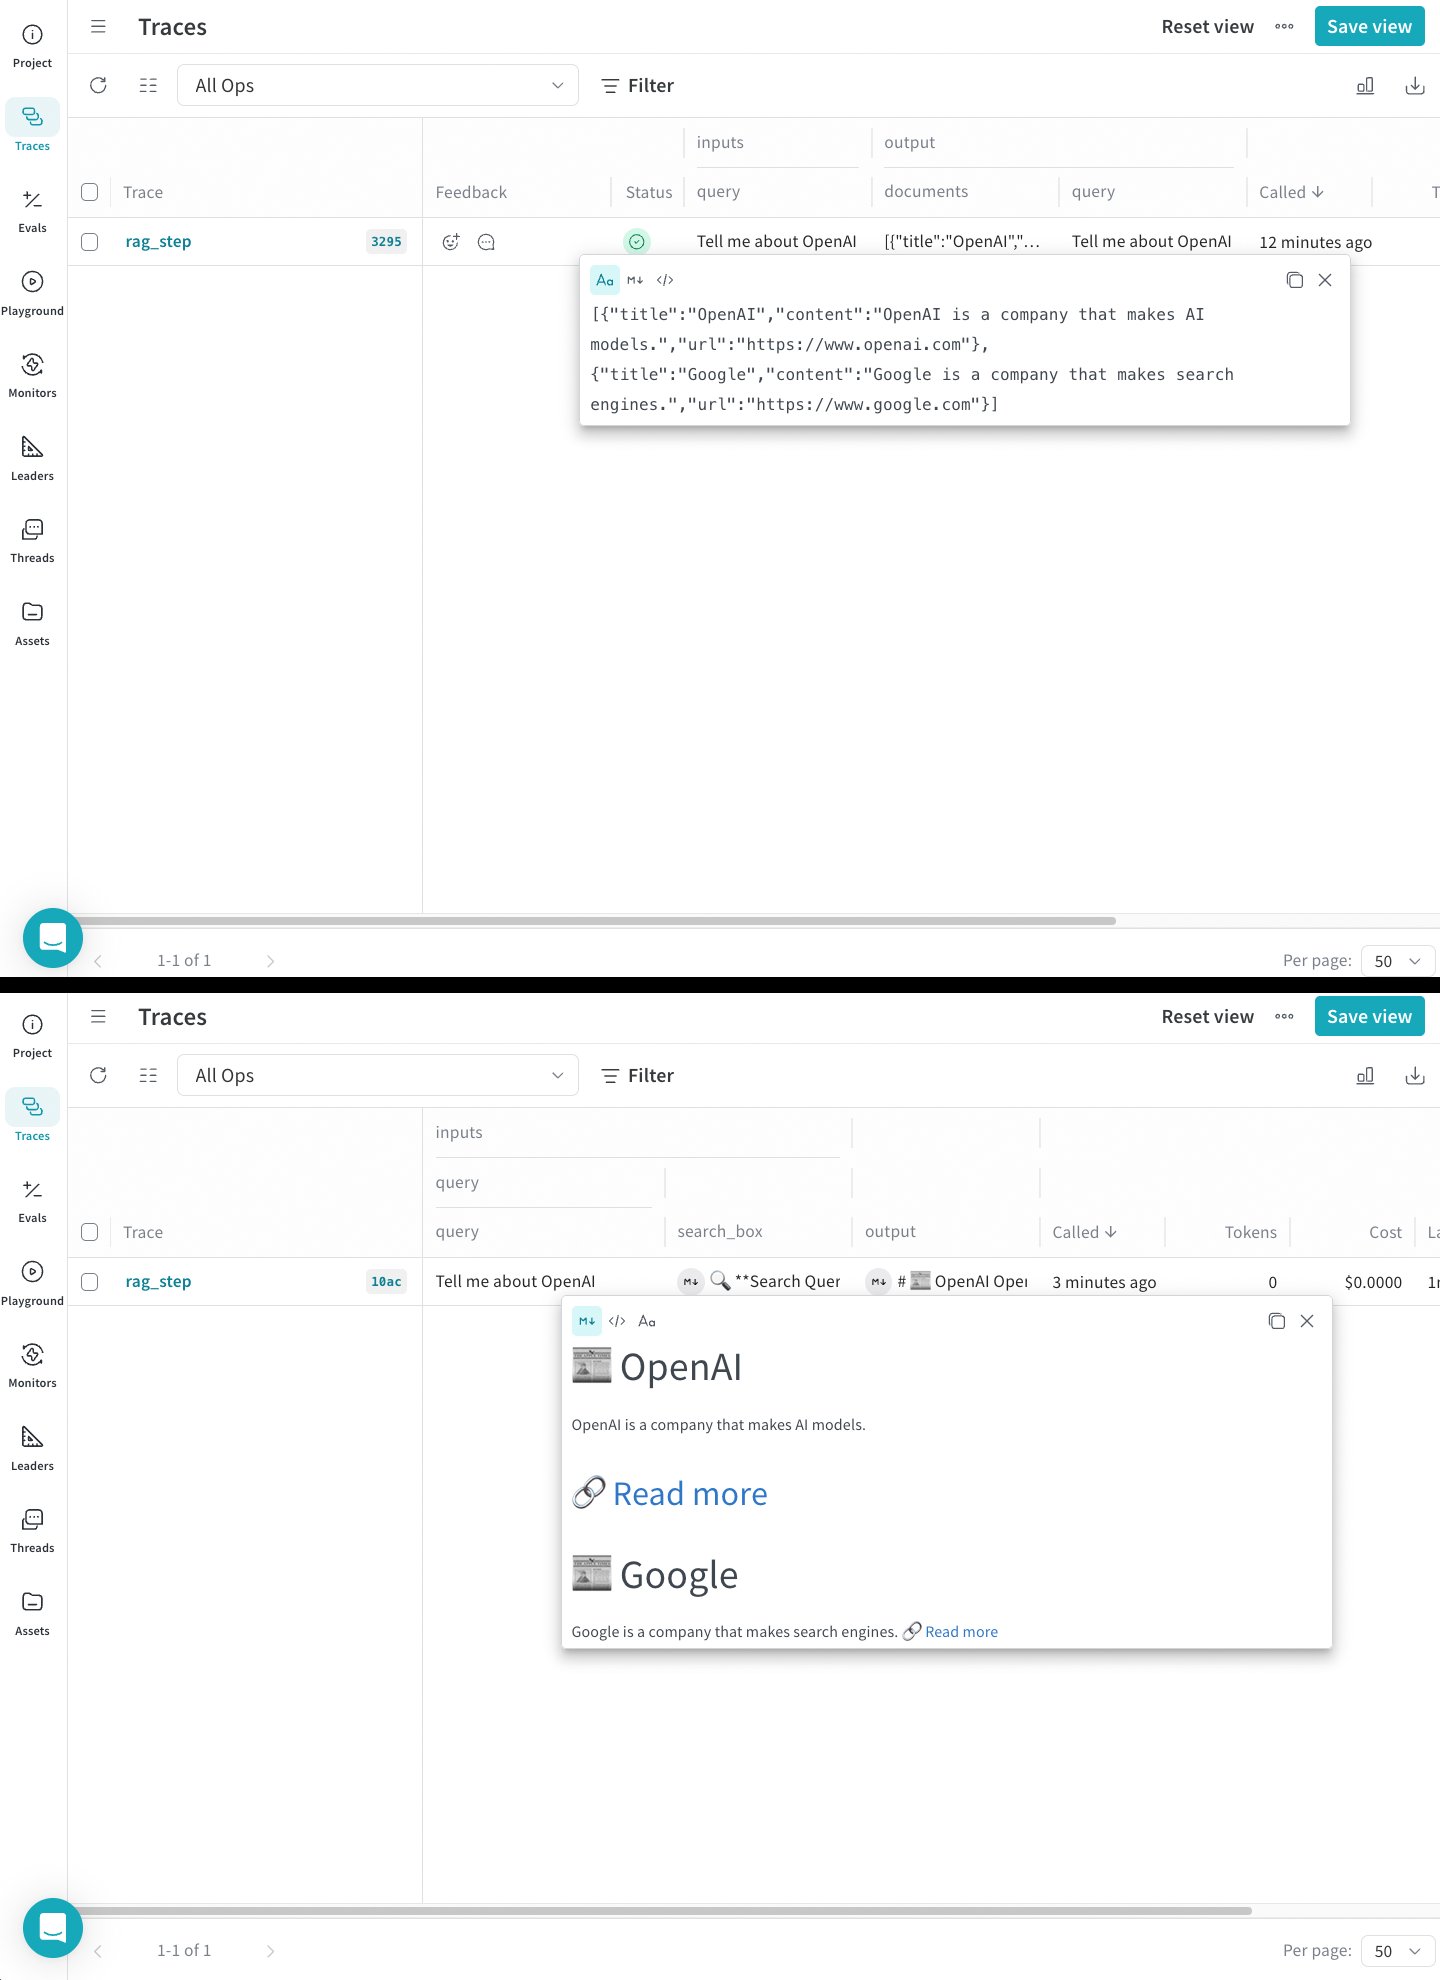
`weave.Markdown` を使用すると、元のデータを失うことなく、トレース情報の表示方法をカスタマイズできます。これにより、基になるデータ構造を保持したまま、入力と出力を読みやすく整形されたコンテンツブロックとして表示できます。
`@weave.op` デコレータの `postprocess_inputs` 関数と `postprocess_output` 関数を使用して、トレースデータを整形します。次のコード例では、ポストプロセッサを使用して、Weave 上の call を絵文字付きのより読みやすい形式で表示します。
```python lines theme={null}
import weave
def postprocess_inputs(query) -> weave.Markdown:
search_box = f"""
**Search Query:**
``+`
{query}
``+`
"""
return {"search_box": weave.Markdown(search_box),
"query": query}
def postprocess_output(docs) -> weave.Markdown:
formatted_docs = f"""
# {docs[0]["title"]}
{docs[0]["content"]}
[Read more]({docs[0]["url"]})
---
# {docs[1]["title"]}
{docs[1]["content"]}
[Read more]({docs[1]["url"]})
"""
return weave.Markdown(formatted_docs)
@weave.op(
postprocess_inputs=postprocess_inputs,
postprocess_output=postprocess_output,
)
def rag_step(query):
# S&P 500 企業に関する新聞記事の例
docs = [
{
"title": "OpenAI",
"content": "OpenAI is a company that makes AI models.",
"url": "https://www.openai.com",
},
{
"title": "Google",
"content": "Google is a company that makes search engines.",
"url": "https://www.google.com",
},
]
return docs
if __name__ == "__main__":
weave.init('markdown_renderers')
rag_step("Tell me about OpenAI")
```
```plaintext theme={null}
この機能は、TypeScript SDK ではまだ利用できません。
```
次のスクリーンショットでは、未整形の出力と整形後の出力を並べて確認できます。