> ## Documentation Index
> Fetch the complete documentation index at: https://wb-21fd5541-docs-hivemind-launch.mintlify.site/llms.txt
> Use this file to discover all available pages before exploring further.
# モニターを設定する
> 本番トラフィックを受動的にスコアリングし、傾向や問題を可視化します
モニターでは、LLM judges を使用して本番トラフィックを受動的にスコアリングし、LLM アプリケーションにおける傾向や問題を可視化できます。たとえば、アプリケーションの応答をモニタリングして正確性や有用性を確認したり、ユーザー入力をモニタリングして、ユーザーがエージェントに何を尋ねているかの傾向を特定したりできます。モニターはすべてのスコアリング結果を Weave のデータベースに自動的に保存するため、過去の傾向やパターンを分析できます。
アプリケーションの入力と出力に含まれるテキスト、画像、オーディオをモニタリングできます。
モニターの設定にあたって、アプリケーションのコードを変更する必要はありません。W\&B Weave UI を使用して設定します。
スコアに基づいてアプリケーションの振る舞いに能動的に介入する必要がある場合は、代わりに [guardrails](/ja/weave/guides/evaluation/guardrails) を使用してください。
## Weave で モニター を作成する方法
Weave で モニター を作成するには、次の手順に従います。
1. [W\&B UI](https://wandb.ai/home) を開き、Weave プロジェクトを開きます。
2. Weave の サイドナビ で **Monitors** を選択し、**+ New Monitor** ボタンをクリックします。すると、**Create new monitor** モーダルダイアログが開きます。
3. Create new monitor メニューで、次のフィールドを設定します。
* **Name**: 文字または数字で始める必要があります。使用できるのは、文字、数字、ハイフン、アンダースコアです。
* **Description** (任意) : モニター の内容を説明します。
* **Active monitor** toggle: モニター のオン/オフを切り替えます。
* **Calls to monitor**:
* **Operations**: モニター 対象の `@weave.op` を 1 つ以上選択します。利用可能な op の一覧に表示される前に、その op を使用したトレースを少なくとも 1 つログする必要があります。
* **Filter** (任意) : 対象にする call を絞り込みます (たとえば、`max_tokens` や `top_p` で絞り込めます) 。
* **Sampling rate**: score する call の割合です (0% ~ 100%) 。
Sampling rate を低くすると、各 scoring call にコストがかかるため、コストを抑えられます。
* **LLM-as-a-judge configuration**:
* **Scorer name**: 文字または数字で始める必要があります。使用できるのは、文字、数字、ハイフン、アンダースコアです。
* **Score Audio**: 利用可能な LLM モデルをフィルターし、オーディオ対応モデルのみを表示するとともに、Media Scoring JSON Paths フィールドを開きます。
* **Score Images**: 利用可能な LLM モデルをフィルターし、画像対応モデルのみを表示するとともに、Media Scoring JSON Paths フィールドを開きます。
* **Judge model**: op を score するモデルを選択します。このメニューには、W\&B アカウントで設定した商用 LLM モデルに加えて、[Serverless Inference models](/ja/inference/models) も含まれます。オーディオ対応モデルには、名前の横に **Audio Input** ラベルが表示されます。選択したモデルについて、次の Settings を設定します。
* **Configuration name**: このモデル設定の名です。
* **System prompt**: 判定モデルの役割とペルソナを定義します。たとえば、"You are an impartial AI judge." です。
* **Response format**: 判定モデルが出力する response の形式です。たとえば、`json_object` やプレーンテキストの `text` です。
* **Scoring prompt**: op を score するための評価タスクです。scoring prompt では、op から [prompt variables](/ja/weave/guides/evaluation/scorers#access-variables-from-your-ops-in-scoring-prompts) を参照できます。たとえば、"Evaluate whether `{output}` is accurate based on `{ground_truth}`." のように指定します。
* **Media Scoring JSON Paths**: Trace Data からメディアを抽出する JSONPath 式 (RFC 9535) を指定します。path を指定しない場合は、ユーザーメッセージ内の score 可能なすべてのメディアが含まれます。このフィールドは、**Score Audio** または **Score Images** を有効にすると表示されます。
4. モニター の各フィールドを設定したら、**Create monitor** をクリックします。これで モニター が Weave プロジェクトに追加されます。コードがトレースを生成し始めると、モニター の名を選択し、表示された panel のデータを確認することで、**Traces** tab で score を確認できます。
また、Weave UI で モニター の Trace Data を [比較](/ja/weave/guides/tools/comparison) して可視化したり、Traces tab のダウンロードボタン () を使って CSV や JSON などの形式でダウンロードしたりすることもできます。
Weave は、すべての scorer の結果を [Call](/ja/weave/guides/tracking/tracing#calls) object の `feedback` フィールドに自動的に保存します。
### 例: 真実性モニターを作成する
次の例では、生成された文の真実性を評価するモニターを作成します。
1. 文を生成する関数を定義します。真実の文もあれば、そうでない文もあります。
```python theme={null}
import weave
import random
import openai
weave.init("my-team/my-weave-project")
client = openai.OpenAI()
@weave.op()
def generate_statement(ground_truth: str) -> str:
if random.random() < 0.5:
response = client.chat.completions.create(
model="gpt-4.1",
messages=[
{
"role": "user",
"content": f"Generate a statement that is incorrect based on this fact: {ground_truth}"
}
]
)
return response.choices[0].message.content
else:
return ground_truth
generate_statement("The Earth revolves around the Sun.")
```
```typescript theme={null}
import * as weave from 'weave';
import OpenAI from 'openai';
await weave.init('my-team/my-weave-project');
const client = new OpenAI();
const generateStatement = weave.op(async (ground_truth: string): Promise => {
if (Math.random() < 0.5) {
const response = await client.chat.completions.create({
model: 'gpt-4.1',
messages: [
{
role: 'user',
content: `Generate a statement that is incorrect based on this fact: ${ground_truth}`,
},
],
});
return response.choices[0]?.message?.content ?? '';
}
return ground_truth;
});
await generateStatement("The Earth revolves around the Sun.");
```
2. プロジェクトにトレースをログするため、この関数を少なくとも 1 回実行します。これにより、その op を W\&B UI でモニタリングできるようになります。
3. W\&B UI で Weave プロジェクトを開き、サイドナビから **Monitors** を選択します。次に **New Monitor** を選択します。
4. **Create new monitor** メニューで、以下の値を使って各フィールドを設定します。
* **Name**: `truthfulness-monitor`
* **Description**: `Evaluates the truthfulness of generated statements.`
* **Active monitor**: **on** に切り替えます。
* **Operations**: `generate_statement` を選択します。
* **Sampling rate**: すべての call を score するため、`100%` に設定します。
* **Scorer name**: `truthfulness-scorer`
* **Judge model**: `o3-mini-2025-01-31`
* **System prompt**: `You are an impartial AI judge. Your task is to evaluate the truthfulness of statements.`
* **Response format**: `json_object`
* **Scoring prompt**:
```text theme={null}
出力文が入力文に基づいて正確かどうかを評価してください。
これは入力文です: {ground_truth}
これは出力文です: {output}
レスポンスは、次のフィールドを含む JSON オブジェクトにしてください。
- is_true: 出力文が入力文に基づいて真か偽かを示す boolean。
- reasoning: その文が真または偽である理由。
```
5. **Create Monitor** をクリックします。これにより、モニターが Weave プロジェクトに追加されます。
6. スコアリング関数をテストするため、スクリプト内で真実性の度合いが異なる文を使って関数を呼び出します。
```python theme={null}
generate_statement("The Earth revolves around the Sun.")
generate_statement("Water freezes at 0 degrees Celsius.")
generate_statement("The Great Wall of China was built over several centuries.")
```
```typescript theme={null}
await generateStatement("The Earth revolves around the Sun.");
await generateStatement("Water freezes at 0 degrees Celsius.");
await generateStatement("The Great Wall of China was built over several centuries.");
```
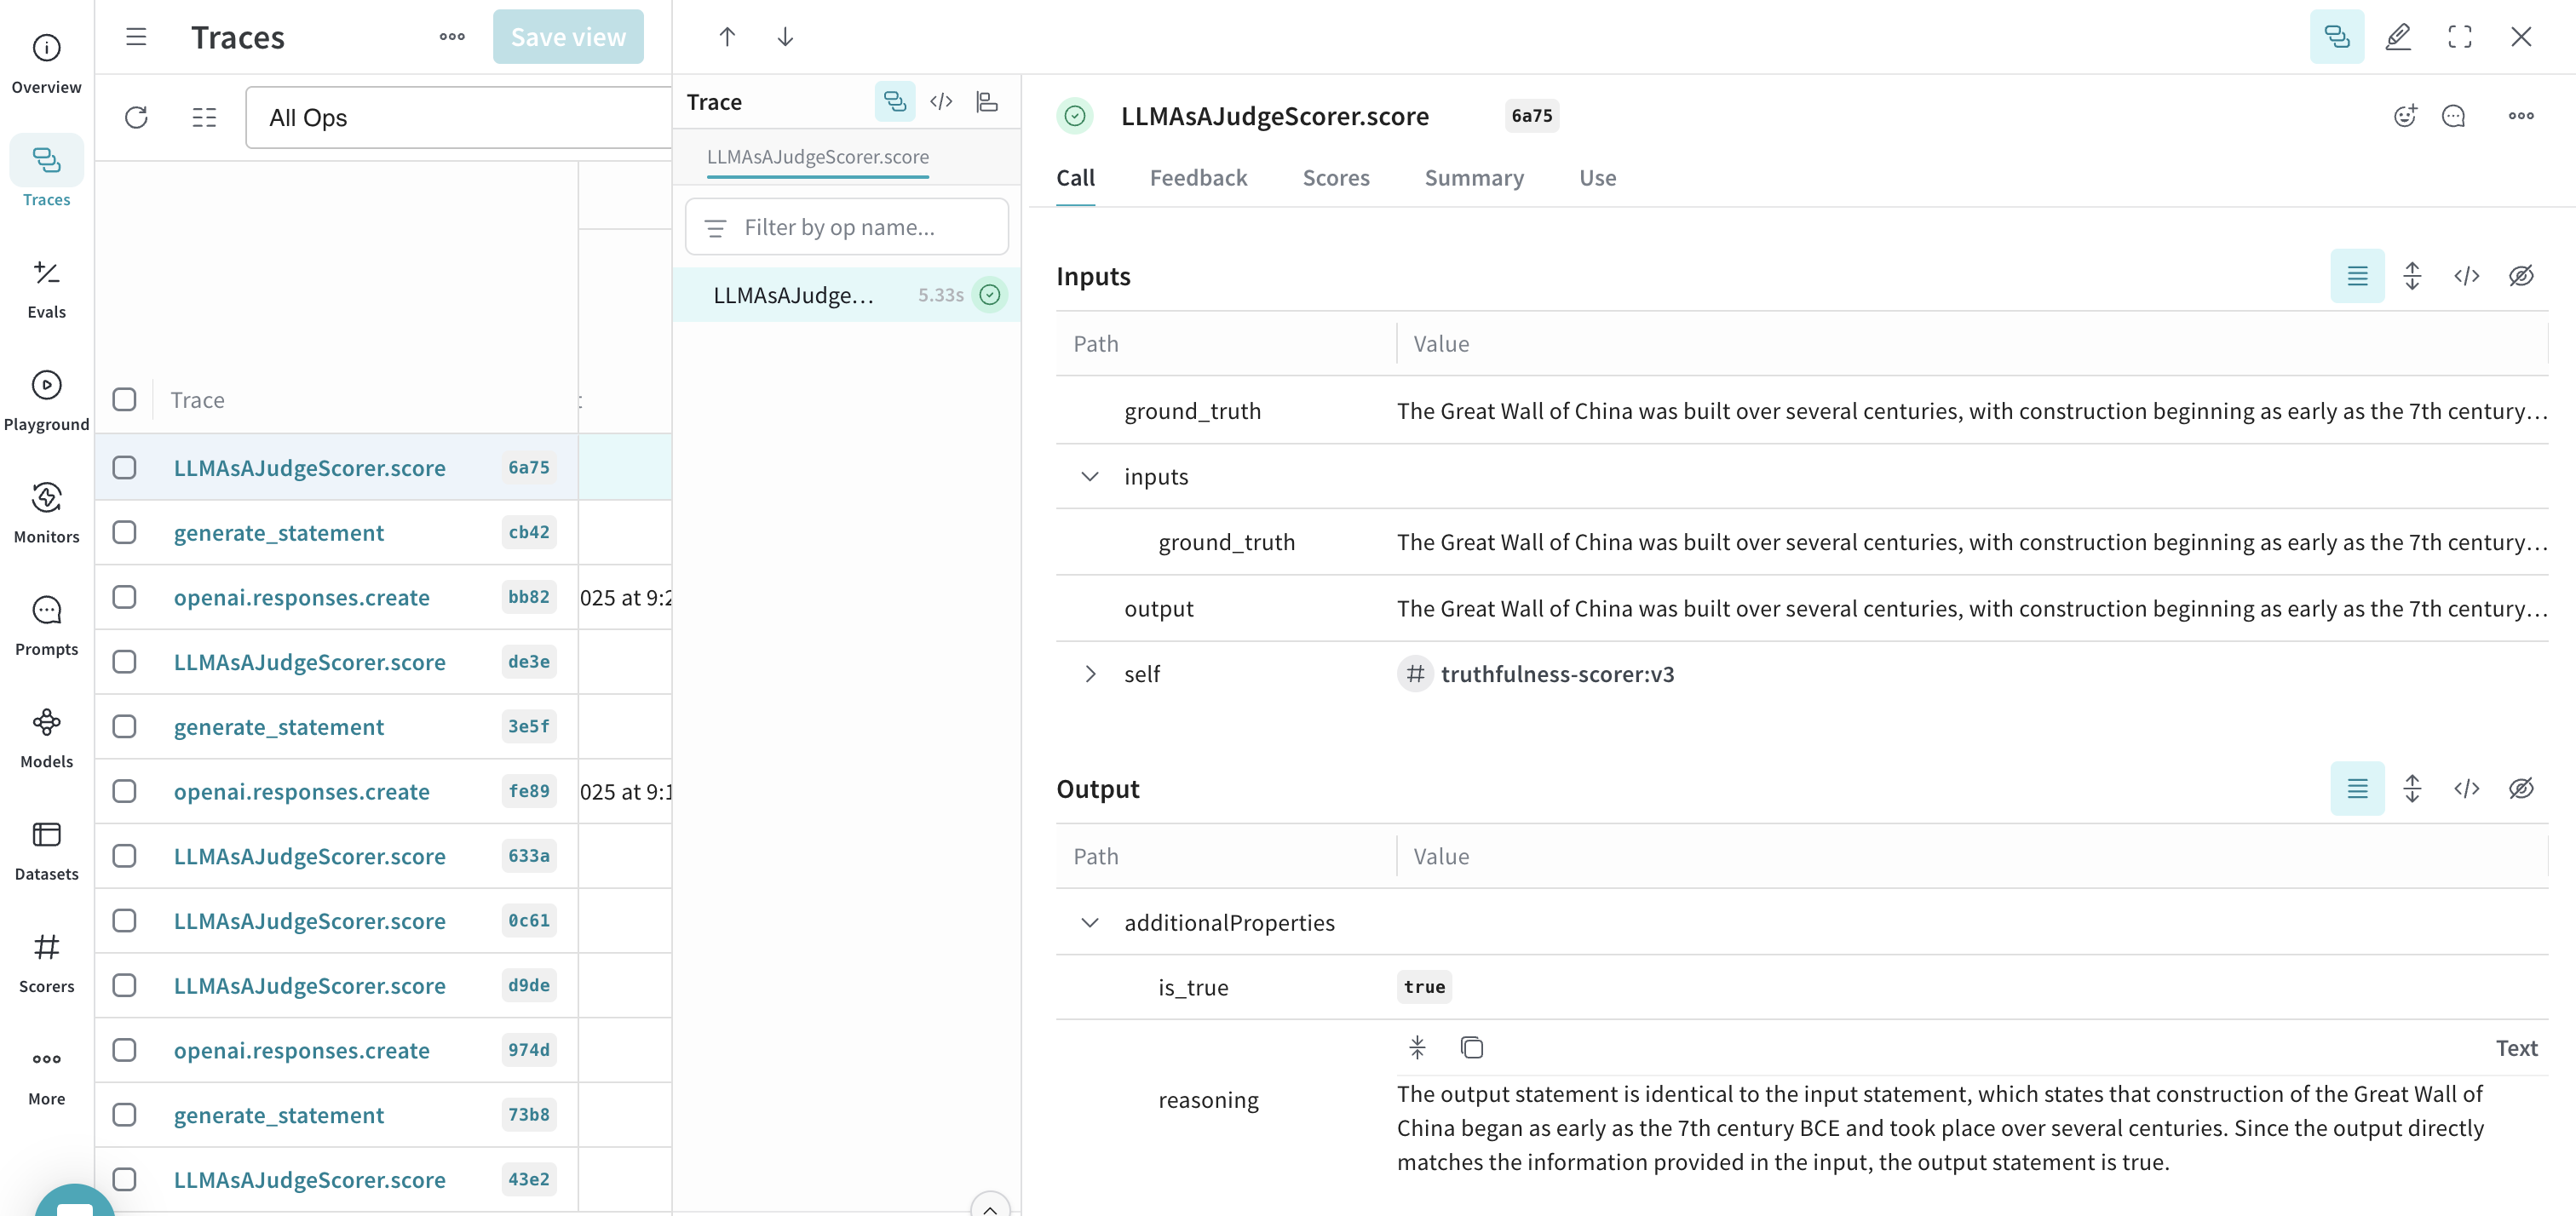
7. いくつか異なる文でスクリプトを実行した後、W\&B UI を開いて **Traces** タブにアクセスします。任意の **LLMAsAJudgeScorer.score** トレースを選択して、結果を確認します。