 2. プロジェクト内でこのジョブを作成します。
```bash theme={null}
wandb job create -n "deploy-to-nvidia-nemo-inference-microservice" \
-e $ENTITY \
-p $PROJECT \
-E jobs/deploy_to_nvidia_nemo_inference_microservice/job.py \
-g andrew/nim-updates \
git https://github.com/wandb/launch-jobs
```
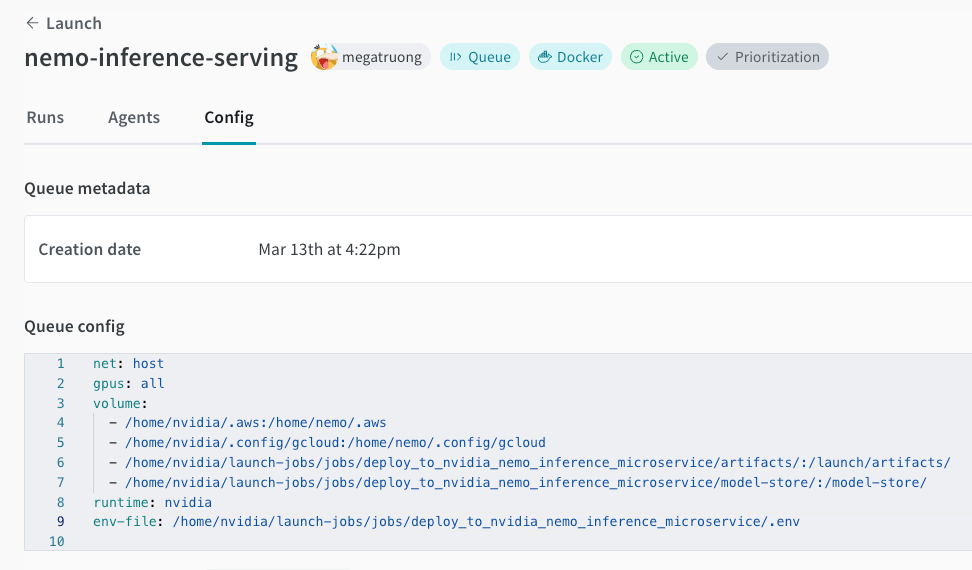
3. GPU マシンでエージェントを起動します。
```bash theme={null}
wandb launch-agent -e $ENTITY -p $PROJECT -q $QUEUE
```
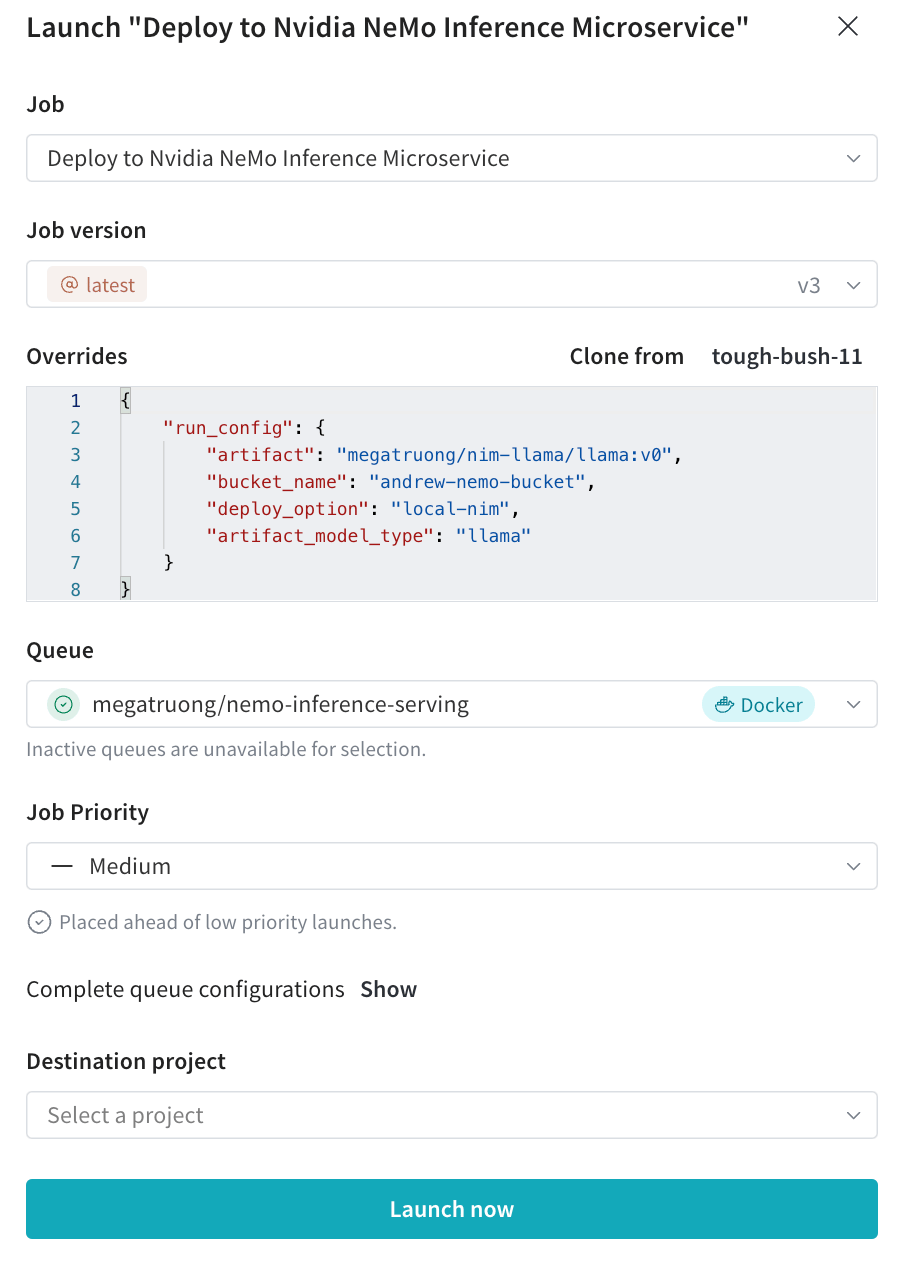
4. [Launch UI](https://wandb.ai/launch) から、必要な設定を指定してデプロイ用の launch ジョブを送信します。
1. CLI から送信することもできます。
```bash theme={null}
wandb launch -d gcr.io/playground-111/deploy-to-nemo:latest \
-e $ENTITY \
-p $PROJECT \
-q $QUEUE \
-c $CONFIG_JSON_FNAME
```
2. プロジェクト内でこのジョブを作成します。
```bash theme={null}
wandb job create -n "deploy-to-nvidia-nemo-inference-microservice" \
-e $ENTITY \
-p $PROJECT \
-E jobs/deploy_to_nvidia_nemo_inference_microservice/job.py \
-g andrew/nim-updates \
git https://github.com/wandb/launch-jobs
```
3. GPU マシンでエージェントを起動します。
```bash theme={null}
wandb launch-agent -e $ENTITY -p $PROJECT -q $QUEUE
```
4. [Launch UI](https://wandb.ai/launch) から、必要な設定を指定してデプロイ用の launch ジョブを送信します。
1. CLI から送信することもできます。
```bash theme={null}
wandb launch -d gcr.io/playground-111/deploy-to-nemo:latest \
-e $ENTITY \
-p $PROJECT \
-q $QUEUE \
-c $CONFIG_JSON_FNAME
```
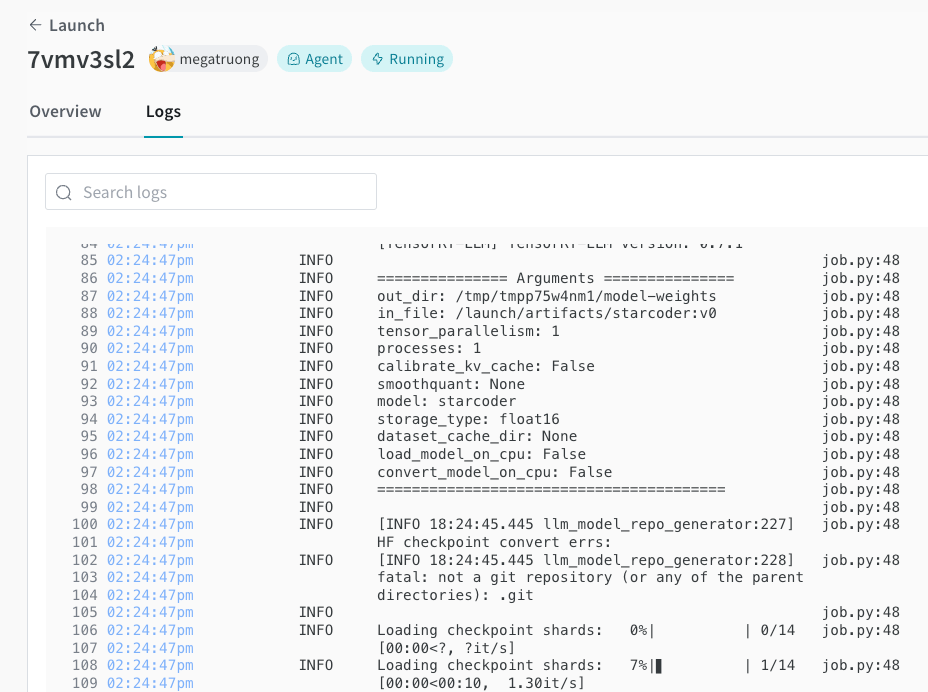
 5. Launch UI でデプロイの進行状況をトラッキングできます。
 6. 完了したら、すぐにエンドポイントに curl リクエストを送ってモデルをテストできます。モデル名は常に `ensemble` です。
```bash theme={null}
#!/bin/bash
curl -X POST "http://0.0.0.0:9999/v1/completions" \
-H "accept: application/json" \
-H "Content-Type: application/json" \
-d '{
"model": "ensemble",
"prompt": "Tell me a joke",
"max_tokens": 256,
"temperature": 0.5,
"n": 1,
"stream": false,
"stop": "string",
"frequency_penalty": 0.0
}'
```
6. 完了したら、すぐにエンドポイントに curl リクエストを送ってモデルをテストできます。モデル名は常に `ensemble` です。
```bash theme={null}
#!/bin/bash
curl -X POST "http://0.0.0.0:9999/v1/completions" \
-H "accept: application/json" \
-H "Content-Type: application/json" \
-d '{
"model": "ensemble",
"prompt": "Tell me a joke",
"max_tokens": 256,
"temperature": 0.5,
"n": 1,
"stream": false,
"stop": "string",
"frequency_penalty": 0.0
}'
```